Within the first two weeks of May, the Equest team focused on finalizing the remaining components of the portable mounting ramp to ensure that a fully-functional ramp and the final CAD assembly are available to showcase at the Spring 2022 EPICS Expo.
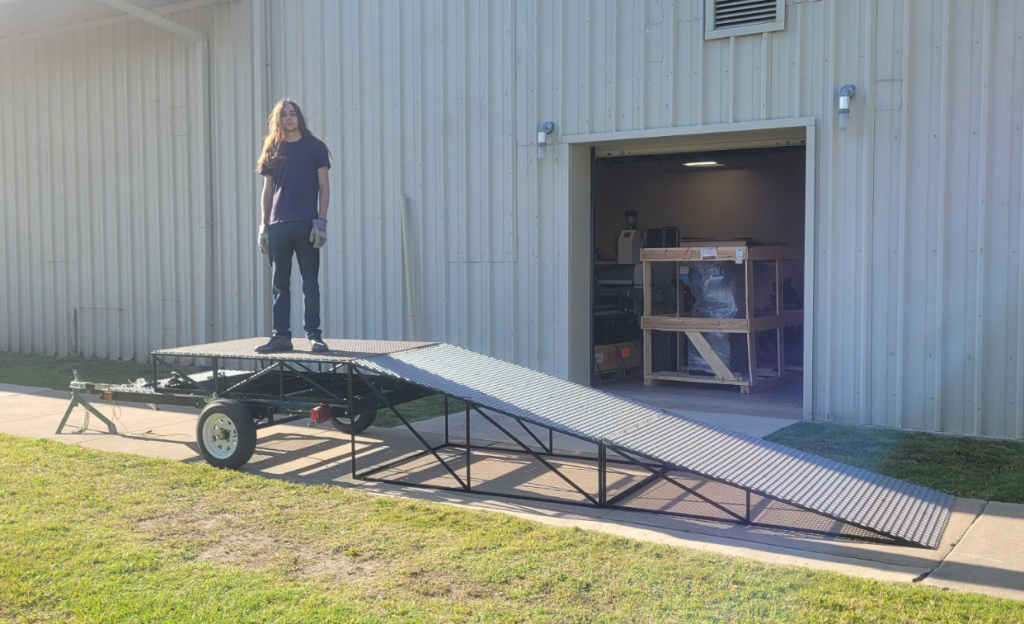
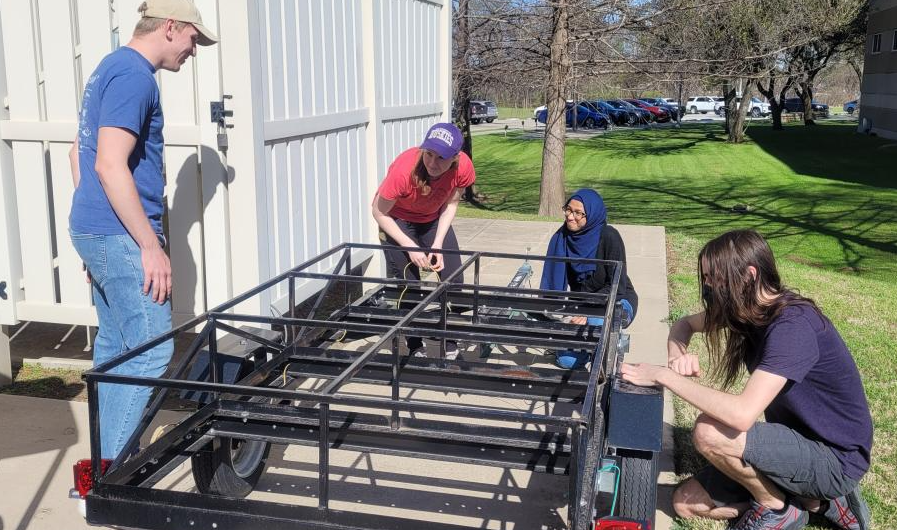
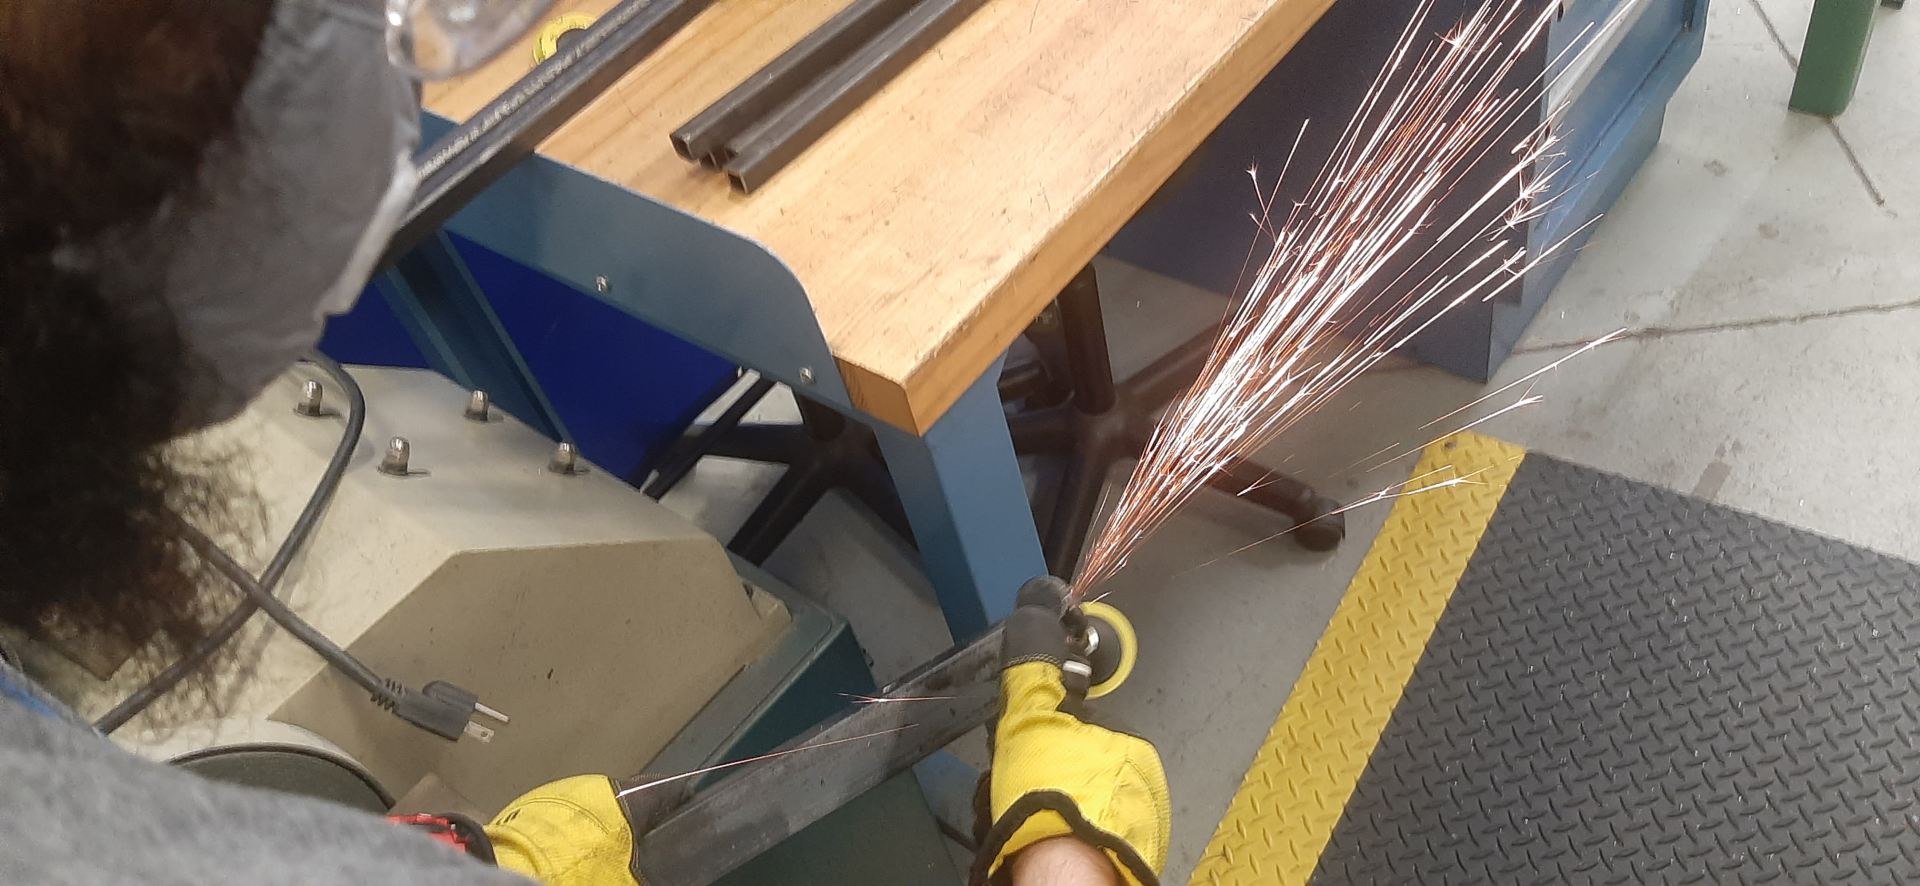
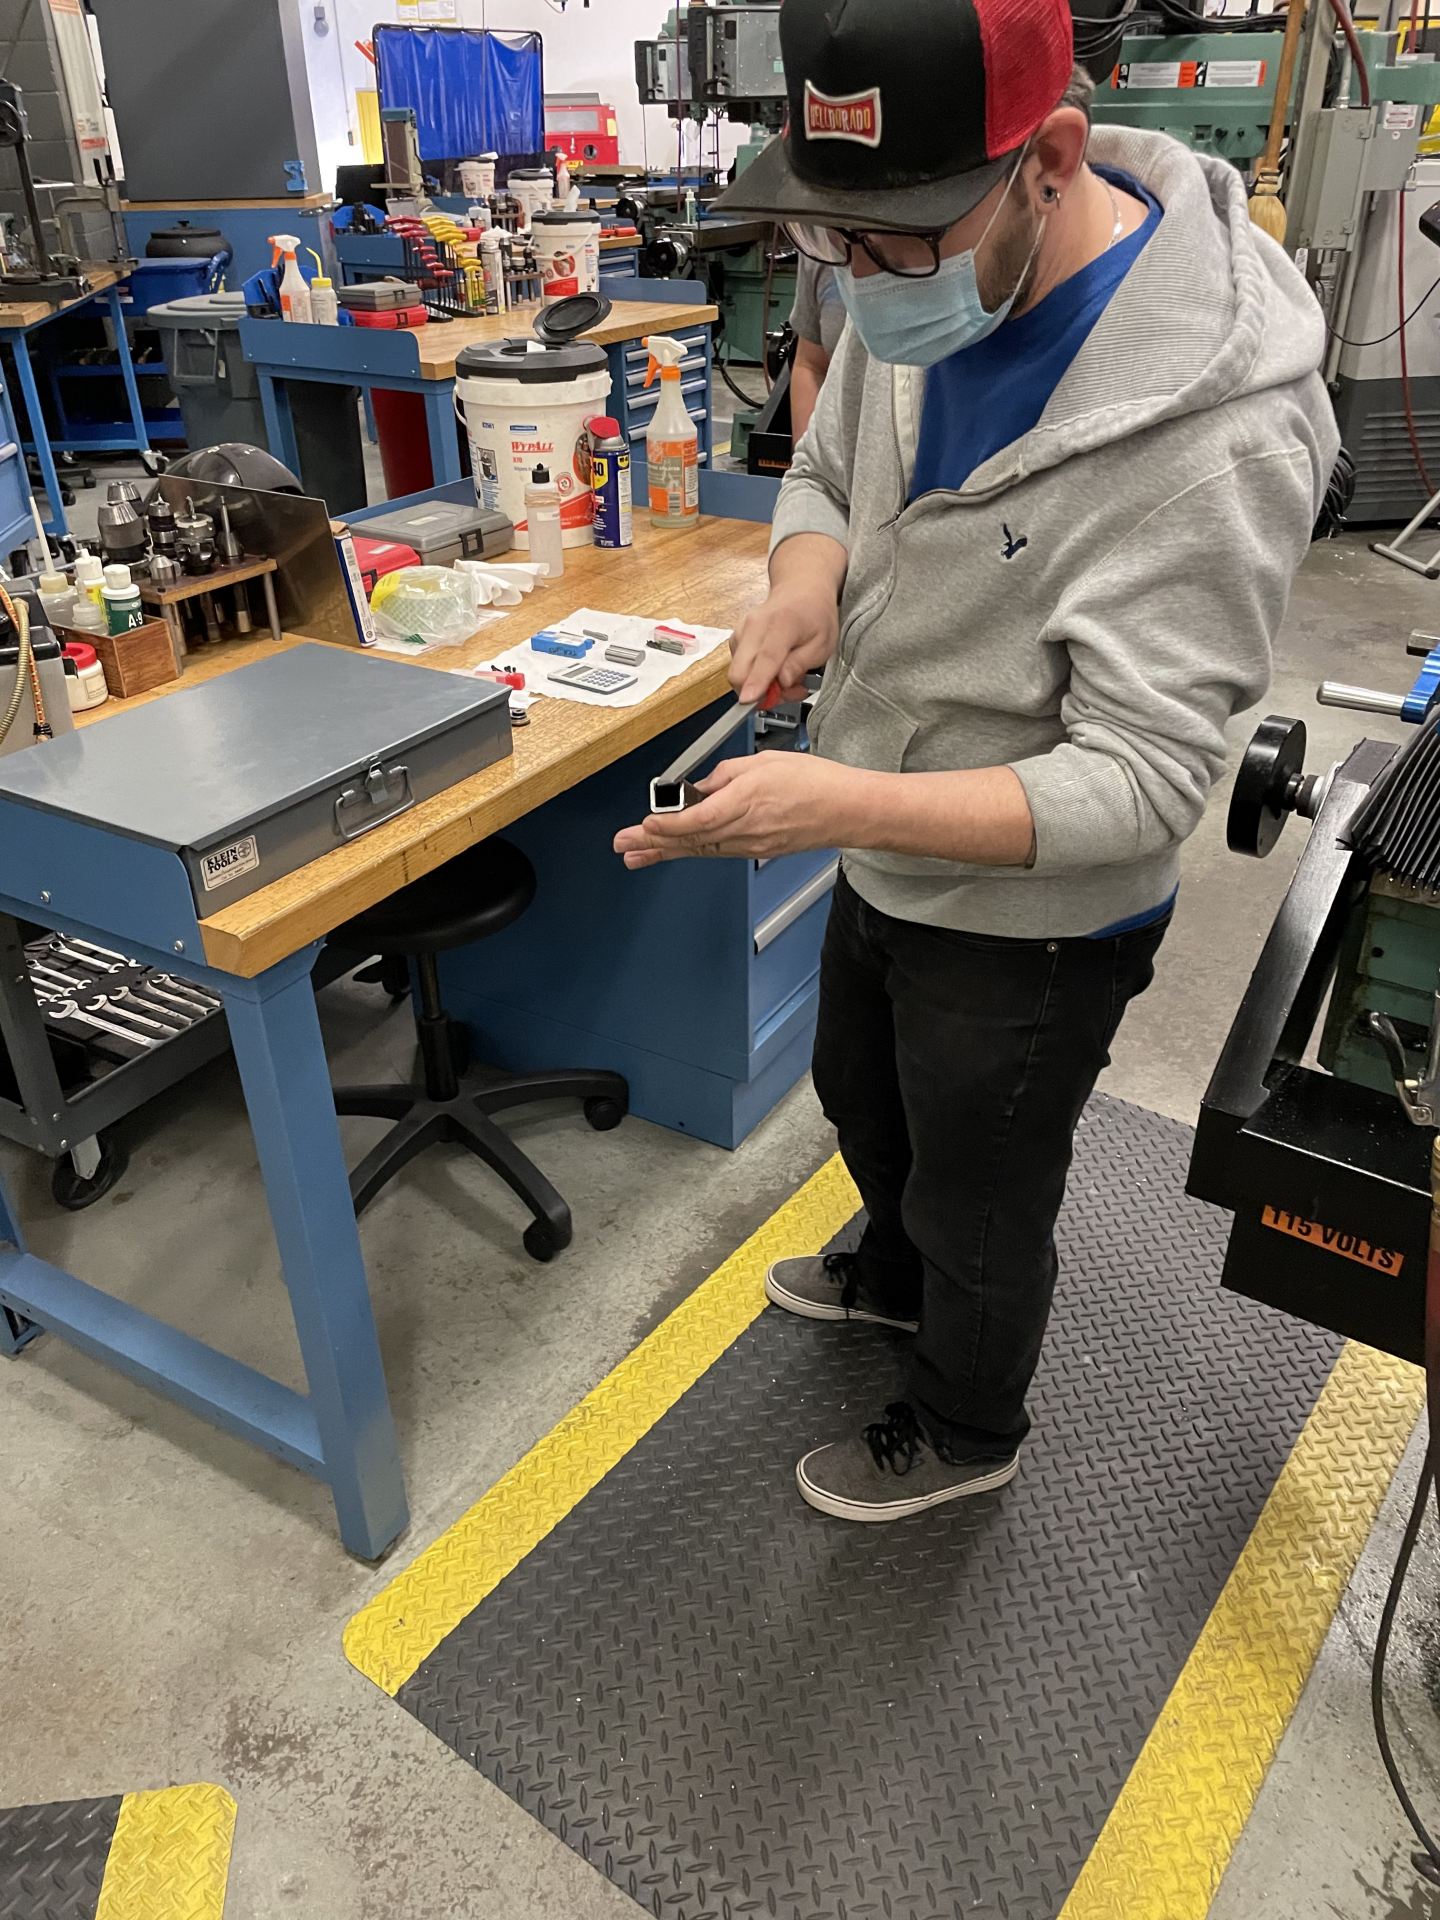
On the week of May 1st, the team visited the North Lab Machine Shop to assist Andrew Bittner in the preparation of the final ramp components for him to machine and weld onto the main ramp assembly. All the expanded metal panels were cut to size during the last week of April, leaving us to remove sections of the ramp frame’s paint for Andrew to sitch-weld the panels onto the frame. In addition, the two hinges and lower-ramp hooks (described in the April 2022 update) were welded onto the ramp components—enabling the ramp’s functionality of the desired folding and hooking mechanisms. Thus, a fully-functional ramp was produced on May 5th, 2022.
The fully-functional ramp with flooring, hinges, and lower-ramp hooks.
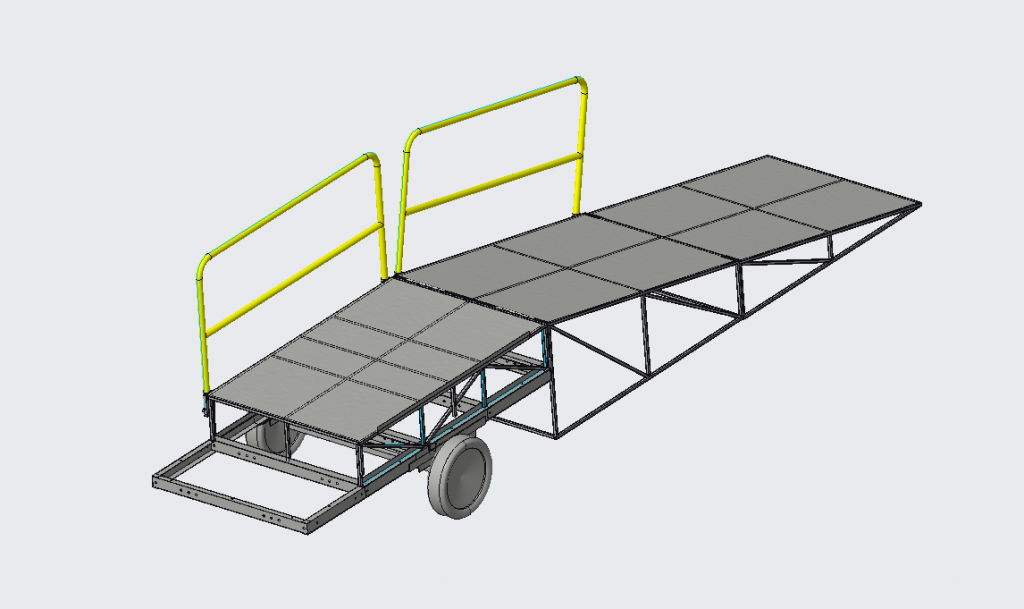
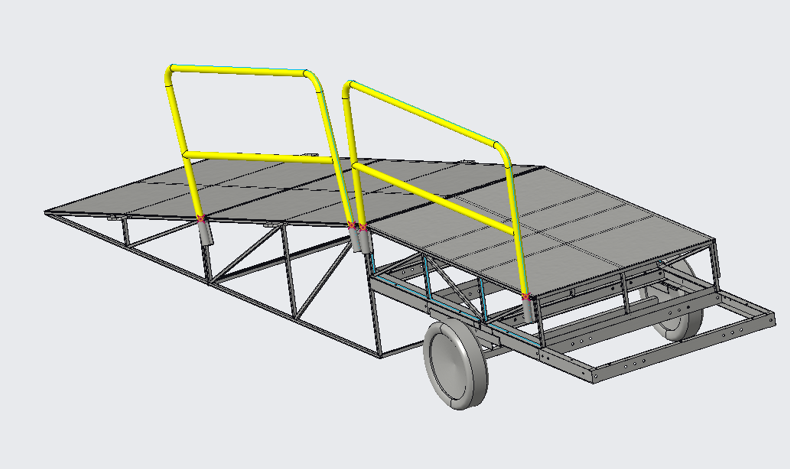
Additionally, the team worked on completing the final CAD assembly of the portable mounting ramp which includes all components and mechanism features.
Full CAD assembly of the portable mounting ramp using Creo Parametric.
[Describe the socket holders once they’re welded on]
[Show image of the handrails attached to the main assembly]
[Describe miscellaneous attachments—safety features & storage mechanisms]
[Show image(s) of feature(s)]
[Describe delivery status to the project partner]
[Show image of the completed portable mounting ramp]
This month, the team worked on finalizing the remaining designs/features of the portable mounting ramp and, additionally, put forth the effort to physically prepare all components and assemble them to the ramp.
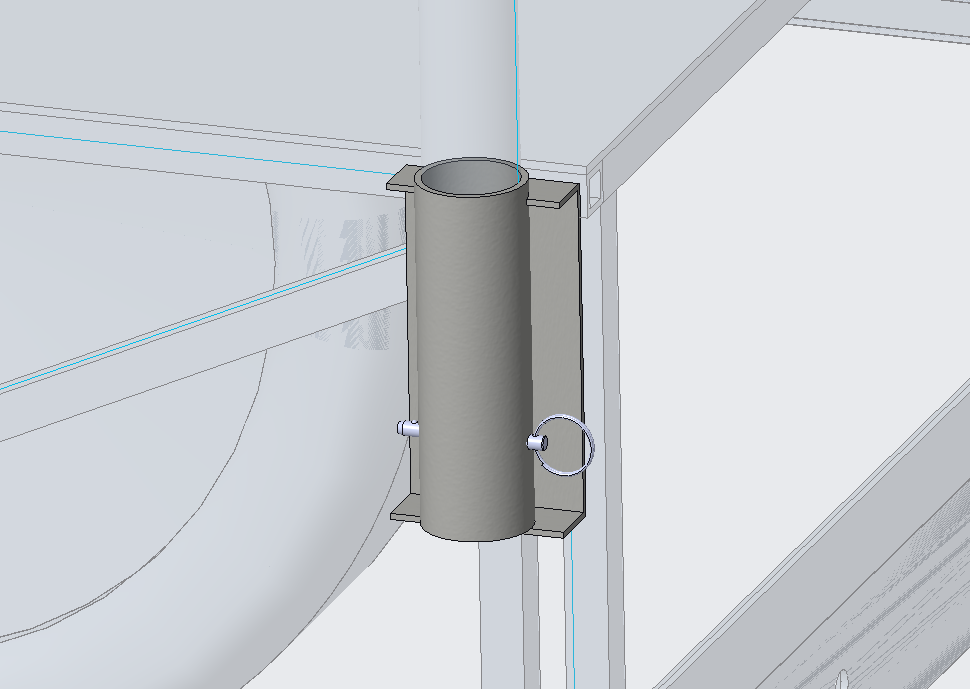
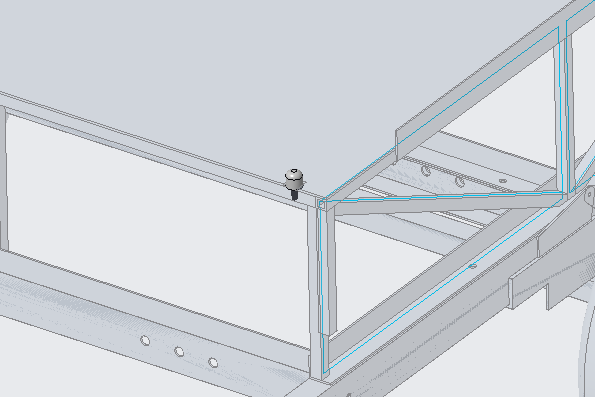
With the handrails selected, the team focused on drafting a handrail holder feature that fixes the safety handrails to the appointed sides of the portable mounting ramp—as depicted in the March update. To achieve this, we decided on fabricating side socket holders—consisting of a tube and a bent plate—that act as outer tube sockets for the handrail ends to slide into. Quick-release spring pin are included with the design, which assist in keeping the inserted rails in place.
Socket holders for the handrails.
Four of these socket holders were created using 1.875″ OD X 0.120″ thickness, 1026 Mild Steel (DOM) round tubes from Metal Supermarkets cut to length of 6″. The 0.100″ thick plates were water-jetted and bent at the North Lab Machine Shop by Andrew Bittner.
To satisfy the folding mechanism requirement of the middle-ramp and the platform, the team ended up going with welding two 1′ piano hinges (purchased from McMaster: 15665A195) on each end of the platform, as shown in the previous update. McMaster doesn’t provide load rating of these items, so we gauged an overall rating—13.9 kip—for two hinges by identifying the shear-force capability of the hinge’s pins.
Estimating the overall load rating of the two hinge’s pins.
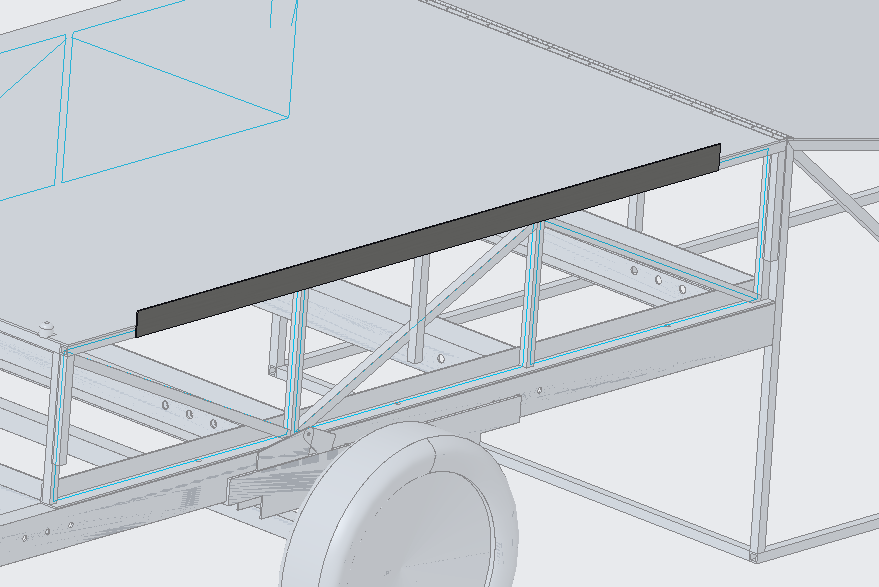
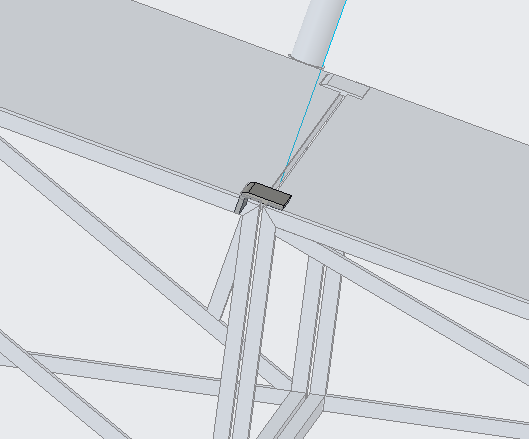
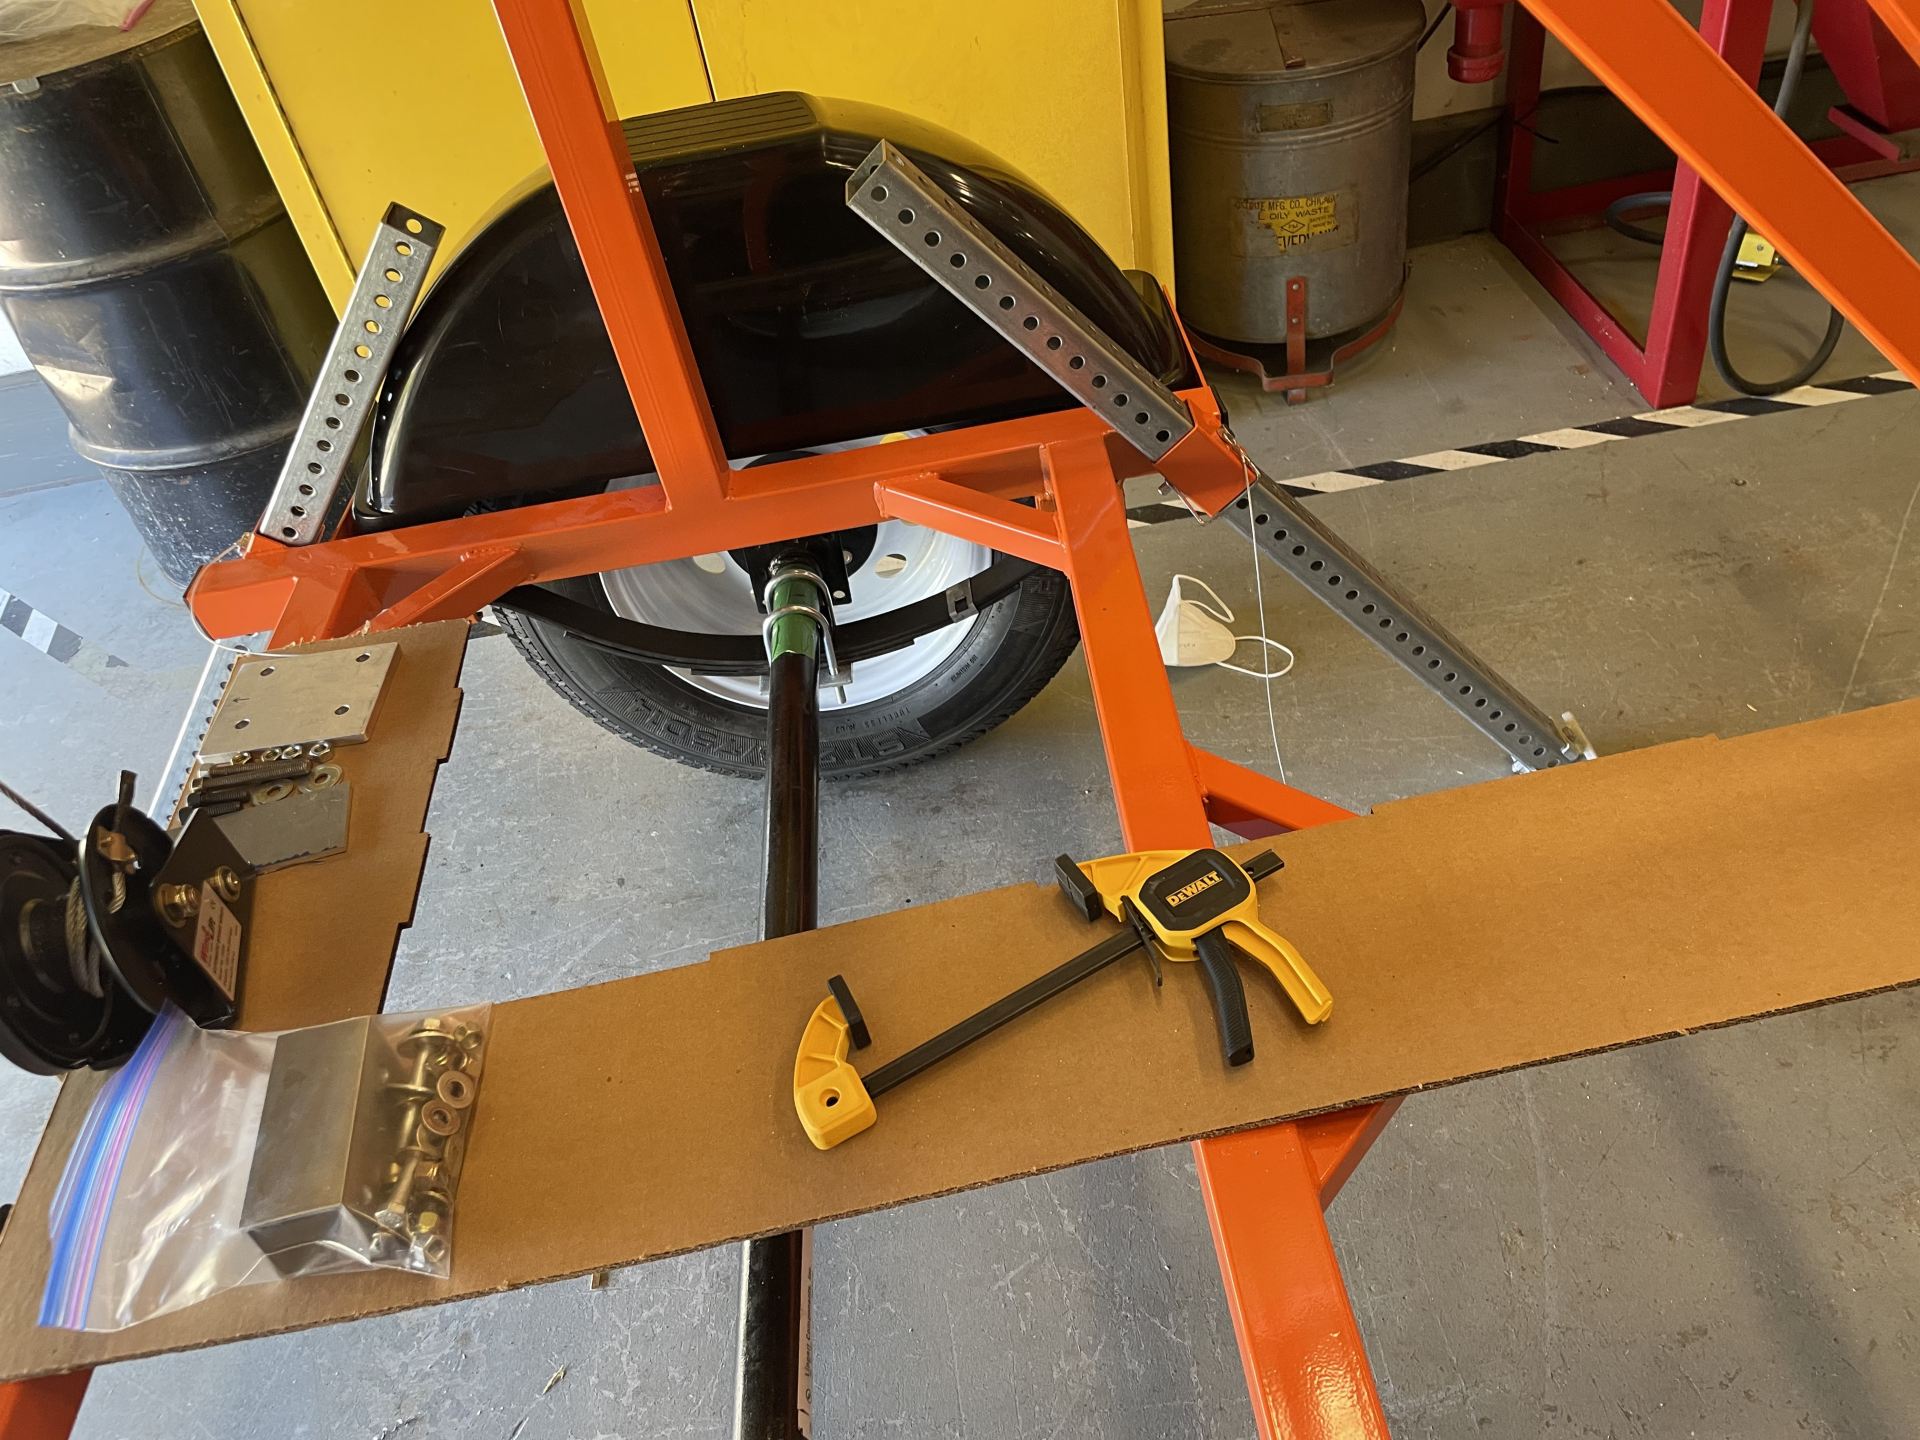
Additionally, the team finalized the designs and selections of several miscellaneous safety features. For example, we decided to incorporate an edge-guarding plate along the loading side of the portable mounting ramp to ensure that wheelchairs can’t roll off during the loading process. Also, we implemented two rubber stoppers (McMaster: 9541K44) at the front edge of the platform to dissipate energy from the middle-ramp in cases where it falls and impacts the platform. To guarantee that the lower-ramp stays in place during the loading process, we also designed and added lower ramp hooks (bent 0.100″ plates) that attach to the middle ramp.
Depiction of the edge-guard plate.Threaded rubber bumper inserted into the front edge of the ramp.Depiction of the lower-ramp hooking onto the middle-ramp.
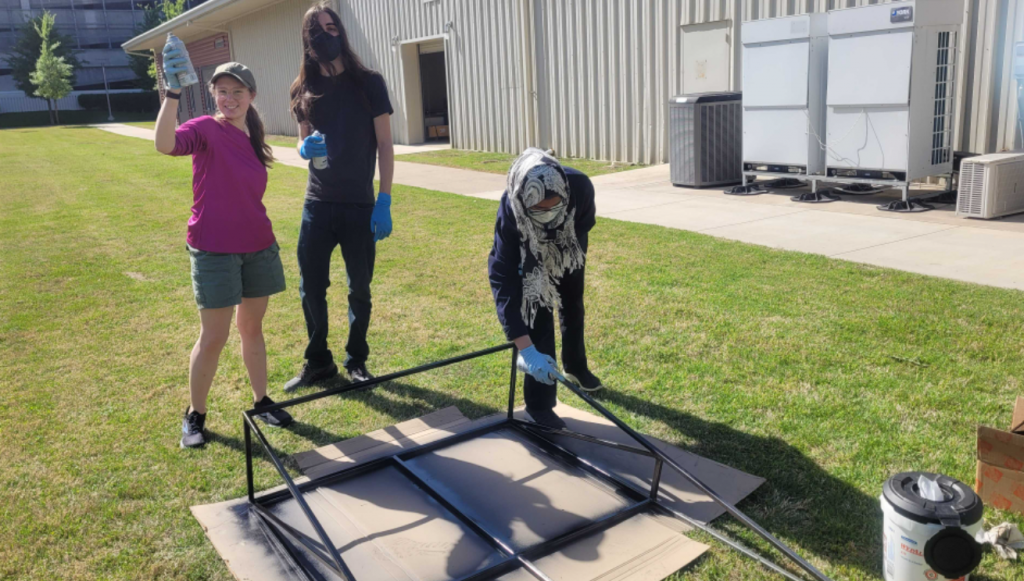
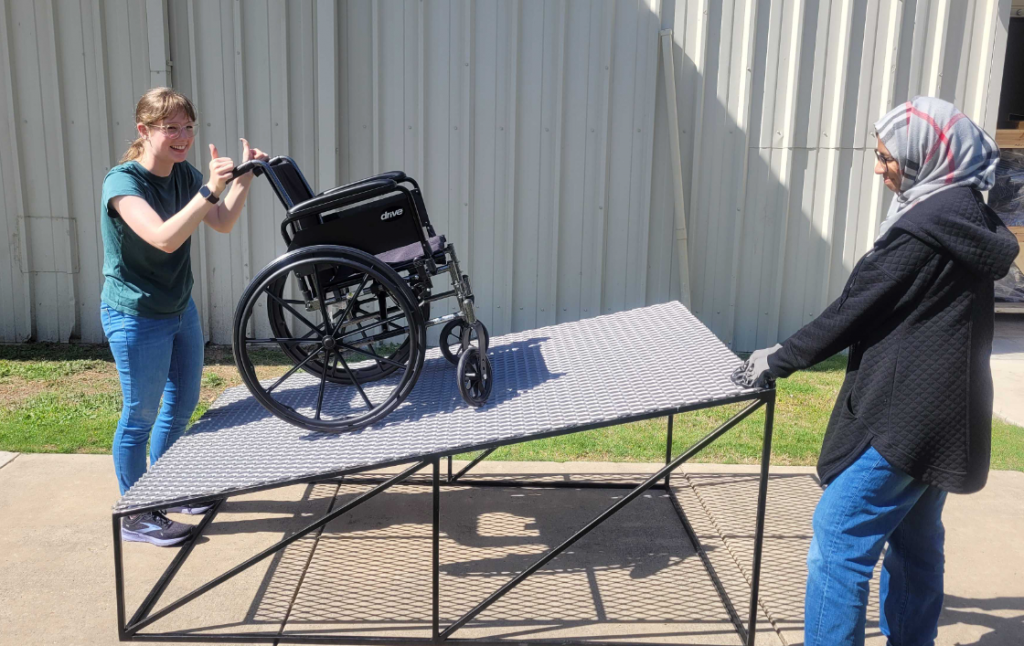
Finally, the majority of our worktime this month went towards physical labor—for instance, painting the lower-ramp, tidying up the wiring for the brake lights, cutting the expanded metal, and testing the motion of a wheelchair on the ramp, as shown in the following images.
Covering the lower-ramp with Black Rustoleum paint.Cutting the expanded metal sheets to size.Testing a wheelchair as it moves up the inclined middle-ramp.
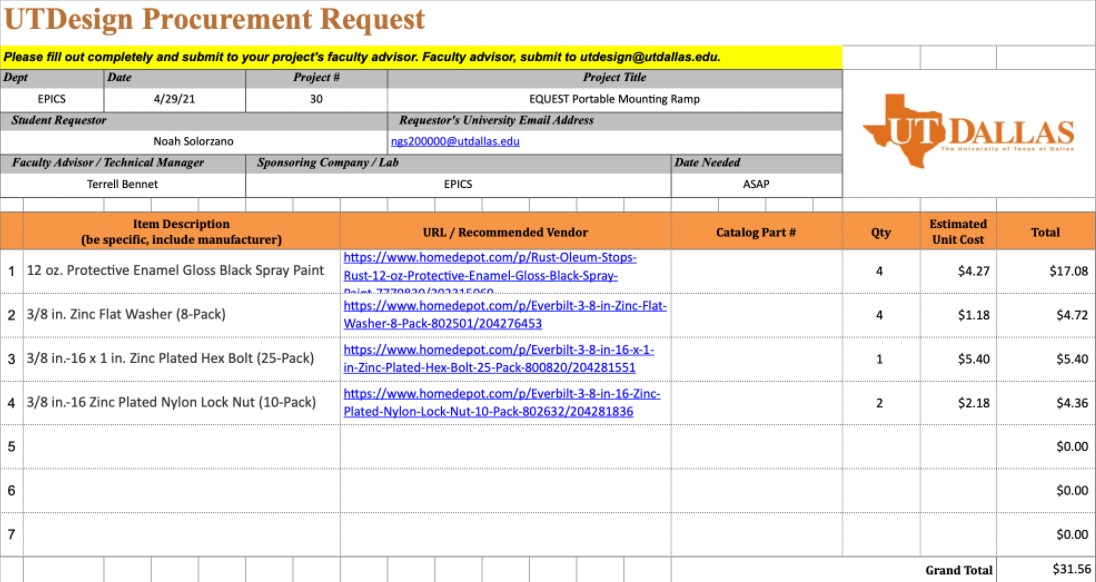
Going into the month of May, we plan to hurriedly complete the final components of the portable mounting ramp and assemble them together. This includes the fabrication, welding, and/or painting of the expanded metal flooring, the hinges, handrail sockets, edge-guard plate, rubber stoppers, and lower-ramp hooks. By the end of the school semester, we aim to have completed the project altogether and delivered to our project partner, Bobby Valdez.
Our main objective this month was to complete our final design choices and prepare purchases for immediate machining/installment.
Starting out, the team focused on finalizing our choices for the main ramp components—namely, the expanded metal flooring, handrails, and ramp hinge(s).
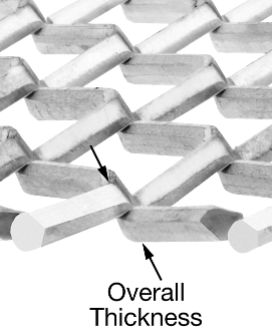
For the expanded metal flooring, we considered McMaster items that heavily reflected the preferences laid out by previous teams. These preferences include a carbon steel composition of the expanded panel, a raised panel style, openings of 2.5″ width and 1.19″ length, and overall sizes that satisfy the top dimensions of the platform and ramps. Thus, three McMaster 9302T66 Carbon Steel Expanded Panels were selected for purchase.
Raised carbon steel expanded metal panel.
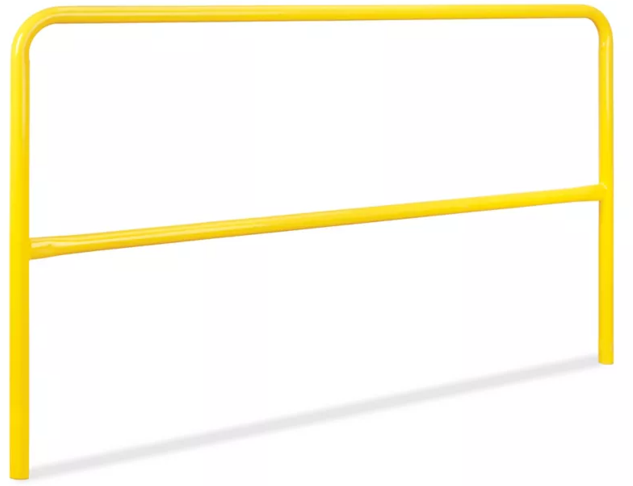
Considering that a detachable handrail is preferred for the mounting ramp, a Uline 6′ Steel Safety Handrail was selected due to it having circular slot ends for sockets and an overall length that is within the length-wise [Insert length] dimension of both the platform and middle ramp. Along the platform and middle ramp edges, the team plans to install custom-designed sleeve sockets to attach to the handrails’ circular slot ends. So far, our team is leaning on purchasing circular tubes on McMaster to serve as the sockets, however, difficulties arise due to the elevated costs of inner-diameter-based tubes. As we purchase and install the components, we simultaneously consider potential solutions/designs for the sockets.
Uline handrails attached to the ramp assembly.Uline 6′ Steel Safety Railing.
Initially, the team planned to purchase a piano hinge that spans along the width of the mounting ramp. However, this option leads to unnecessarily large costs and excessiveness. Thus, we decided to run with two 1 ft. removable-pin piano hinges attaching to both ends of the platform—middle-ramp joint by welding. A load rating isn’t provided by the McMaster website, thus we gauged a shear strength rating of the hinge pin by performing calculations.
Hinges attached to the ramp.
In addition to these main components, we decided to also include several miscellaneous additions. Firstly, we looked into implementing rubber stoppers on the mounting ramp’s front corners to absorb shock in case the middle ramp suddenly drops during the folding process. Websites like McMaster provide stoppers with threaded ends, which we are currently considering purchasing. Additionally, we plan to install an edge-protecting lip along the mounting edge of the platform. With this, we will use a long, flat metal plate to weld across this end.
As described in the previous section, we were considering installing an expanded mounting edge to prevent horses from tripping over the wheels and the side frame tubing. However, the team decided not to go with this idea due to the project partner agreeing to the terms of the previous team’s final design (which didn’t include this feature).
Going into next month, we plan to quickly make our final purchases and begin machining/installing the mounting ramp components. During the month of March, all team members acquired the basic machine shop certification, so we can assist Andrew Bittner during this final assembly process. As of March 31st, 2022, we’ve completed installing the ramp’s trailer rear lights, removed the trailer wheel fenders, and purchased most of the components.
The team installing the rear trailer lights and removing the wheel fenders.
In this month, we began looking into the finalization of the portable + foldable mounting ramp and began preparations for the conceptualization, selection, and purchasing of the remaining components—which includes the hand-rails, expanded metal flooring, hinges, and (a new item) the flooring extension. To ensure a clear understanding of the project, we met with the project partner, Bobby Valdez, and Andrew Bitner to discuss the details, complications, and feasibility of certain components.
In our first meeting with Bobby Valdez, we discussed the initial state of the project and the major goals for this semester. Here, we learned that the frame, designed by previous teams, had already been fully manufactured and welded together, leaving the finishing touches (e.g., the flooring, handrails, hinges) for our team to complete. Bobby mentioned including additional features for the frame such as extending the flooring over the wheels and implementing side-covering panels to prevent the horses from getting injured by kicking the wheels or by having limbs get stuck in the frame, respectively. However, as implied by Andrew Bitner, these additions may not be feasible for the scope of this semester since the costs for the project had already gone over budget in the previous semester.
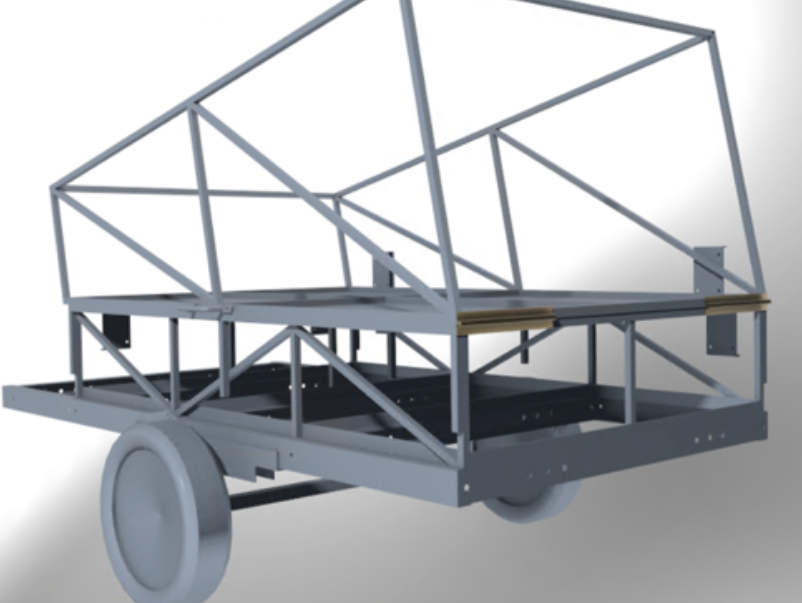
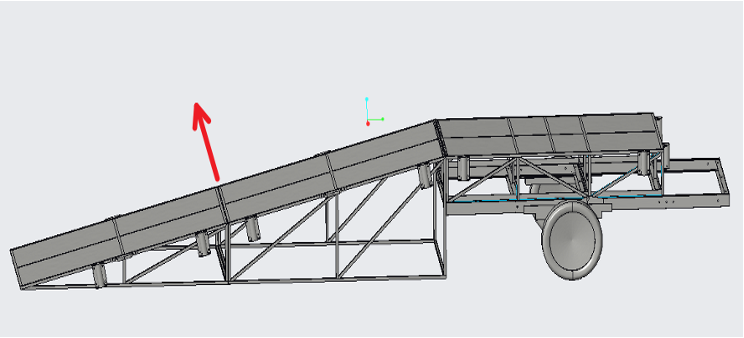
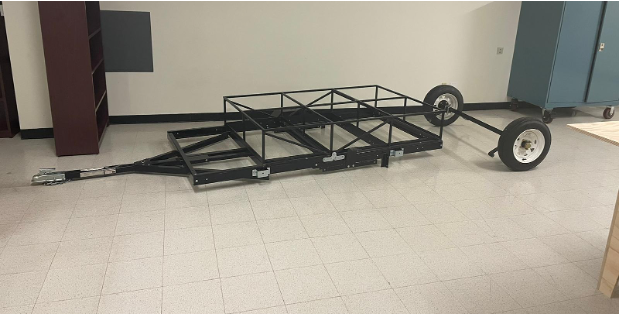
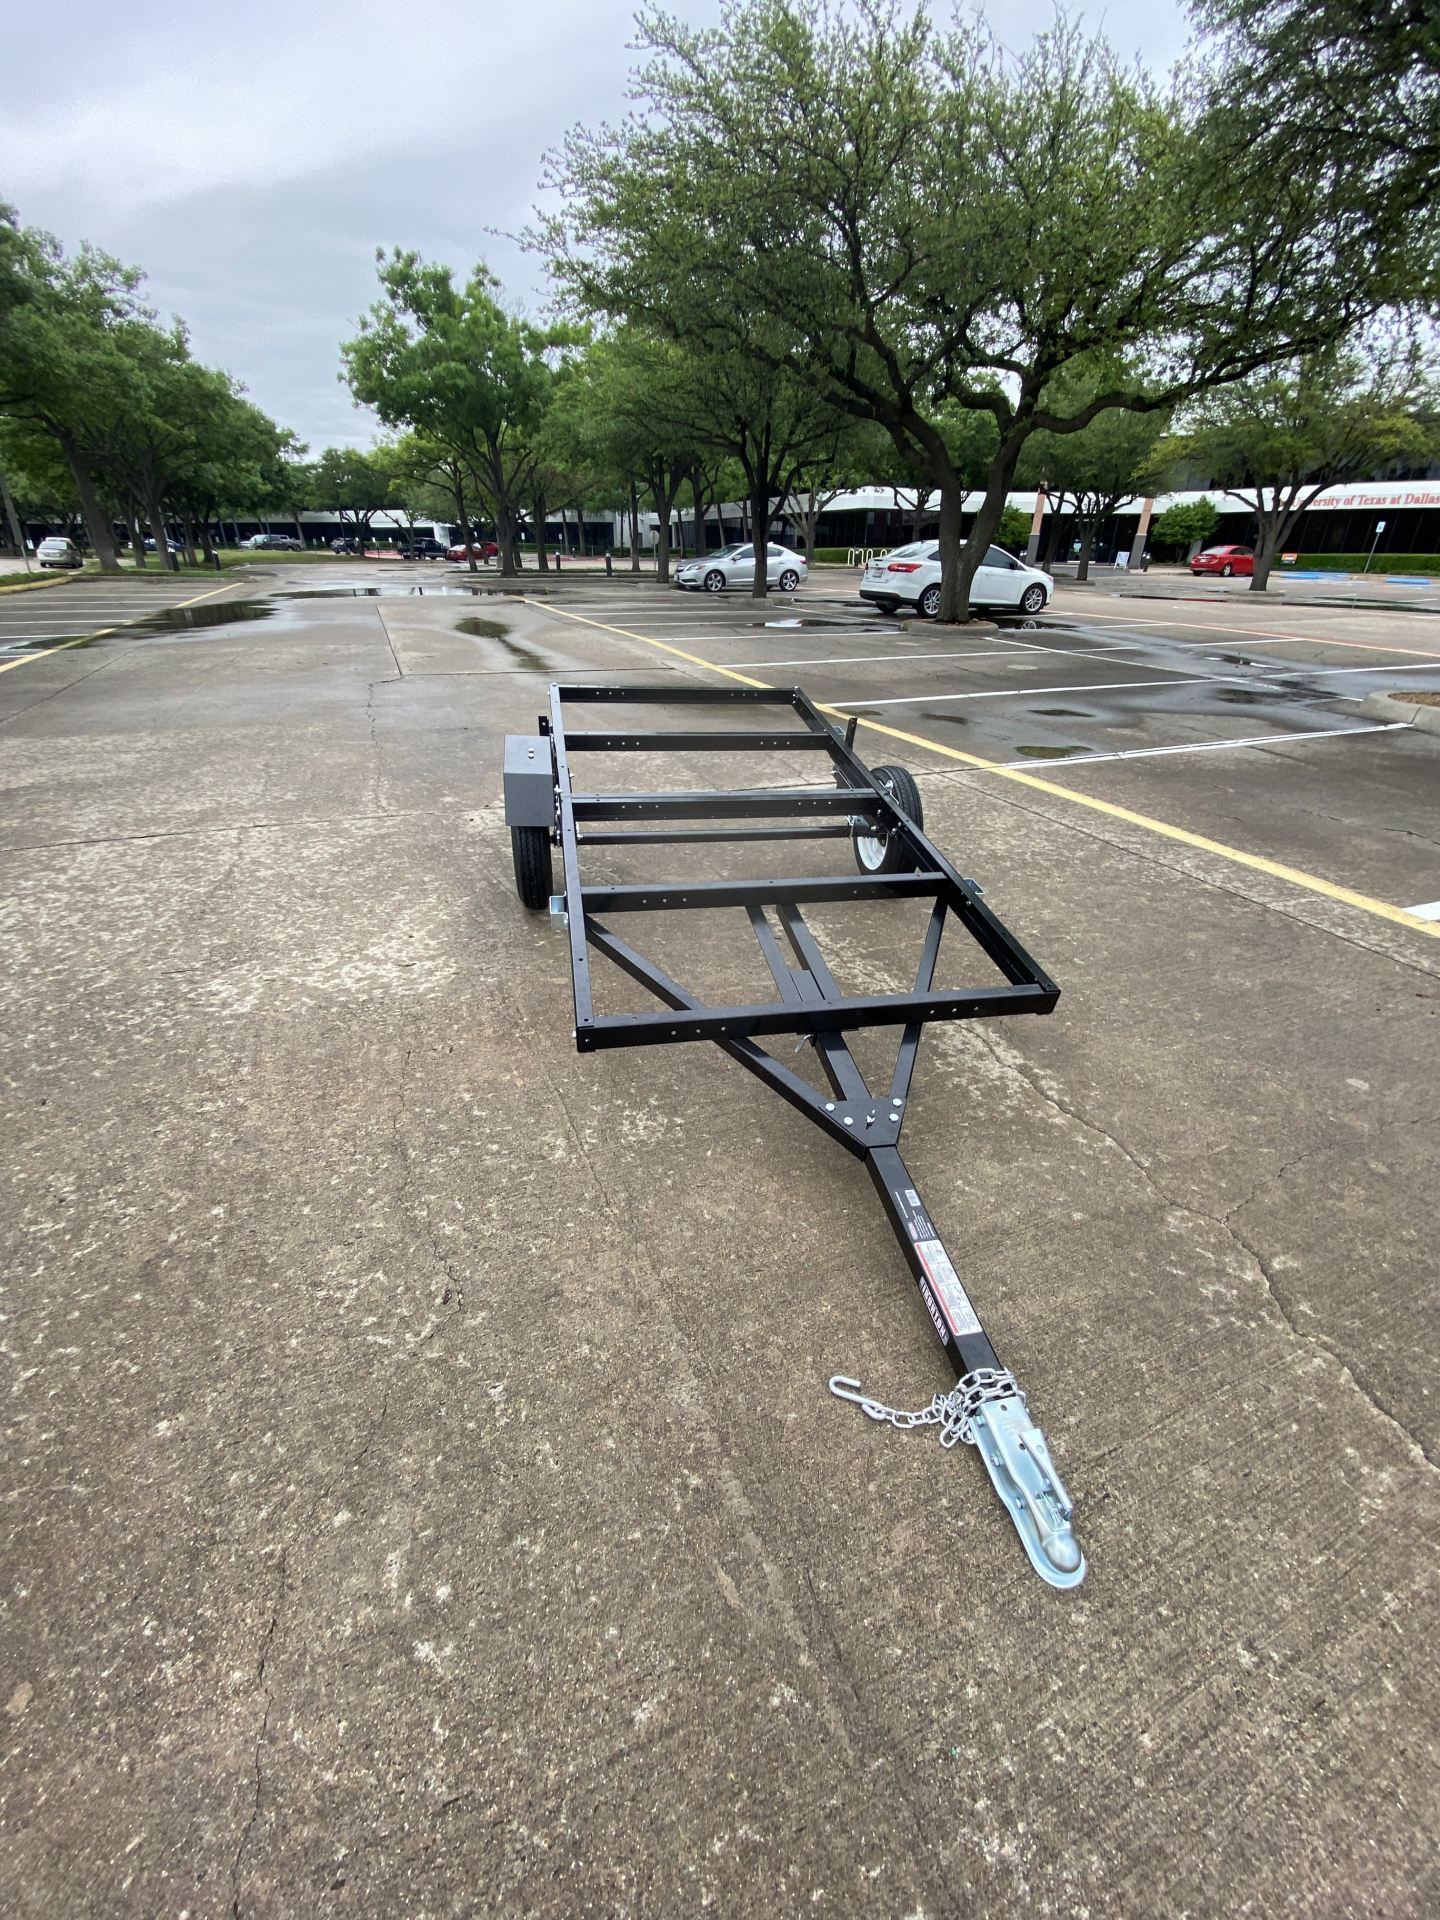
The completed portable mounting ramp frame.
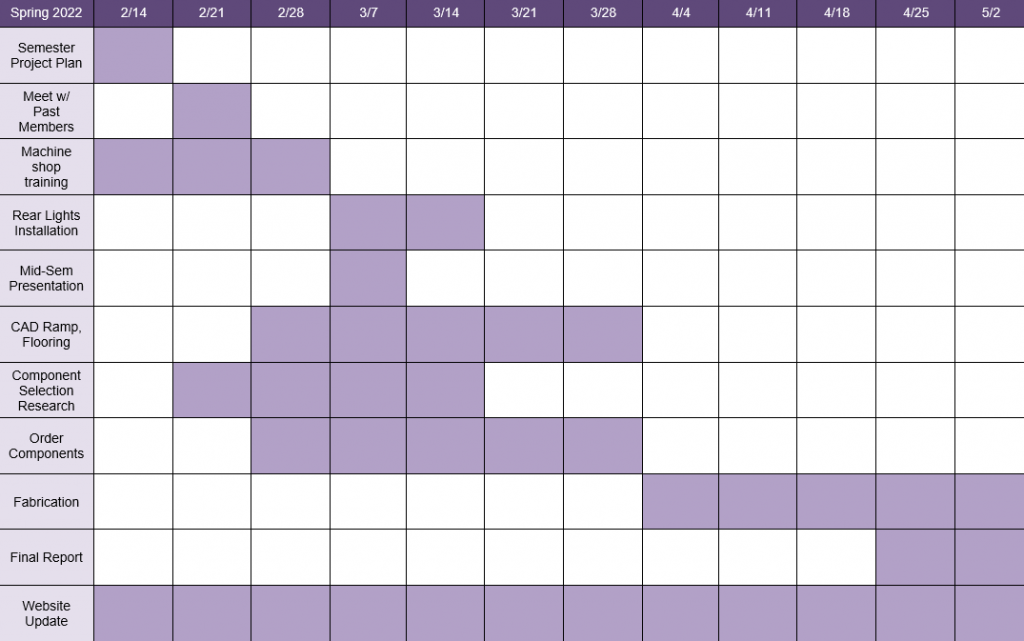
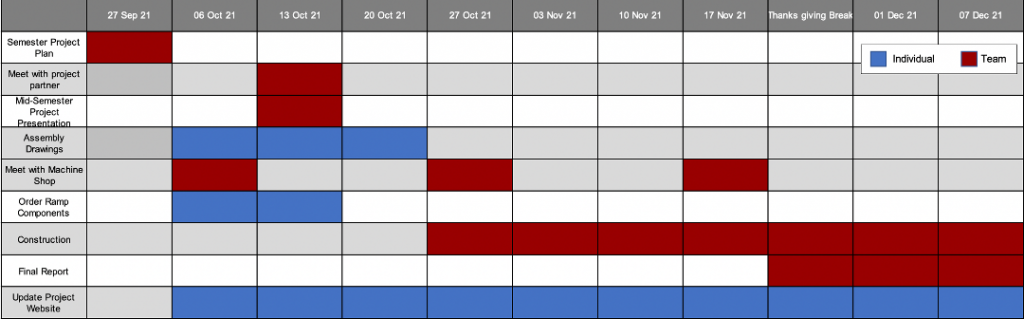
A few weeks into February, our team further organized this semester’s goals with the completion of our Project Charter and Project Plan. Here, we highlighted our main tasks and produced a Gantt chart timeline for us to keep track of time.
Spring 2022 semester timeline for the Equest project.
Since then, we’ve started looking into the conceptualization of this semester’s additions. As mentioned earlier, we met with Andrew Bitner to discuss these concept topics and, subsequently, we were left with a general understanding of how we could approach these various components. Starting off with the handrails, we decided that they would be inserted into sockets on the side of the frame and be removable—allowing users to easily detach the rails and, thus, be able to fold the ramp when needed. However, for the component itself, we could either design the rails ourselves or look into potential online options to save cost and time. For the flooring, the previous semester had already ordered the necessary amounts of expanded metal for the completed frame, though additional material may be required to satisfy the added dimensions from an included flooring extension (which is discussed later). The previous semester introduced piano hinges as a potential option for the ramp hinge, which spans the width of the ramp. To save cost, we are looking into other options of smaller sizes that we can use in numbers to attach the frame components. However, the derivation of force ratings for these other options becomes necessary to ensure zero mechanical failure can occur. These derivations will depend on how we attach the hinges to the frame (either bolts or fillet welds). Finally, we conceptualized how we could approach the platform extension which covers the outward protrusion of the trailer’s wheel and fender. The likelihood of implementing this depends on the budget we’re provided for this semester.
CAD for the platform extension.Aerial view of the platform extension
For next month, our plan is to: 1. Complete the selection/design of the components (Before Spring Break) 2. Purchase the necessary material and components (Before and After Spring Break) 3. Begin machining/welding at the UTD Machine Shop and assist Andrew (After we complete the machine shop training)
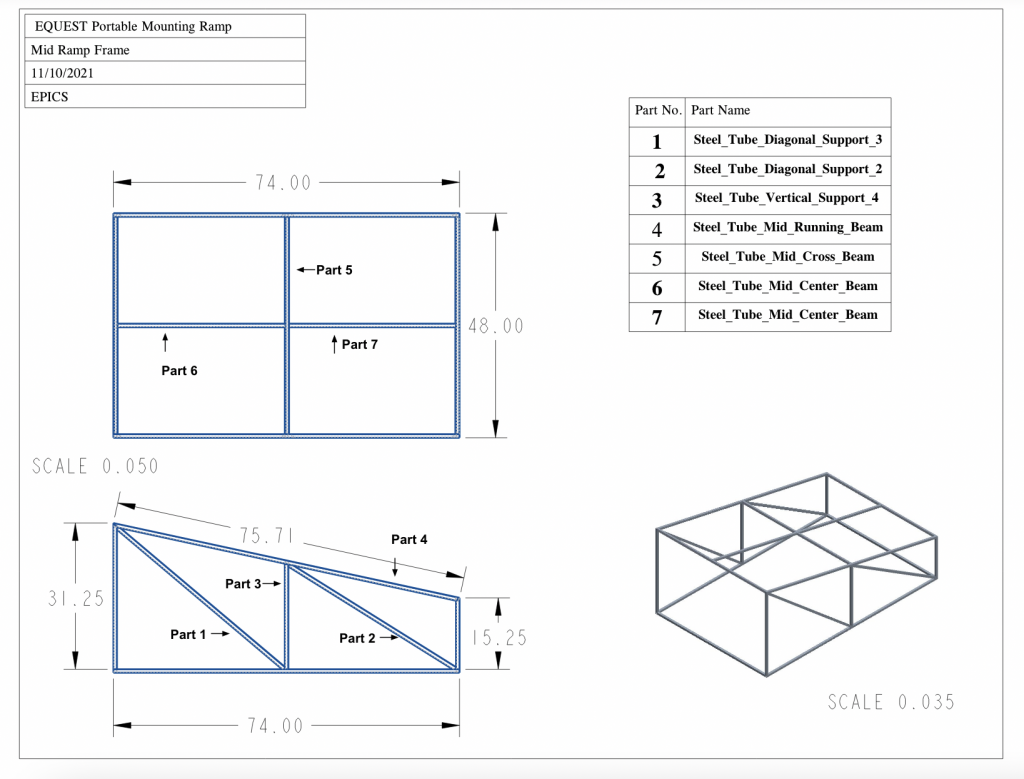
In the month of November, we made great physical progress towards the final product. At the beginning of the month, we moved the trailer from SPN to the UTD Machine Shop in order to start making progress. While we were waiting for our materials to get here, we completed all the assembly drawings for both the mid ramp and the lower ramp.
Mid-Ramp Frame Assembly Drawing
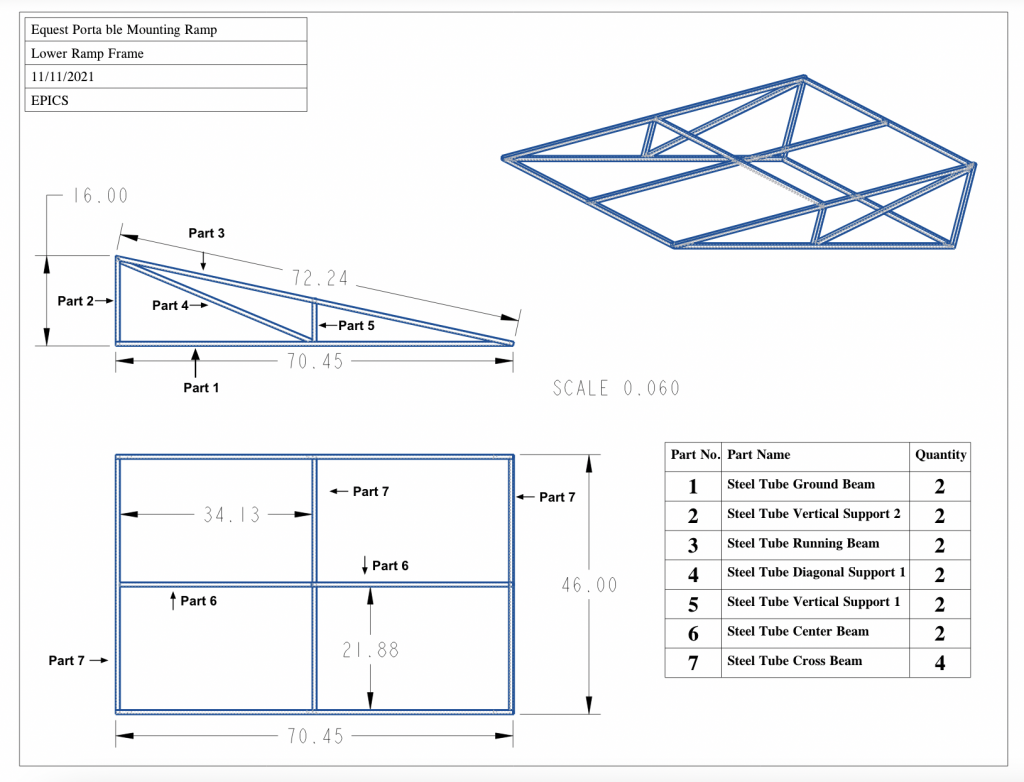
Lower Ramp Frame Assembly Drawing
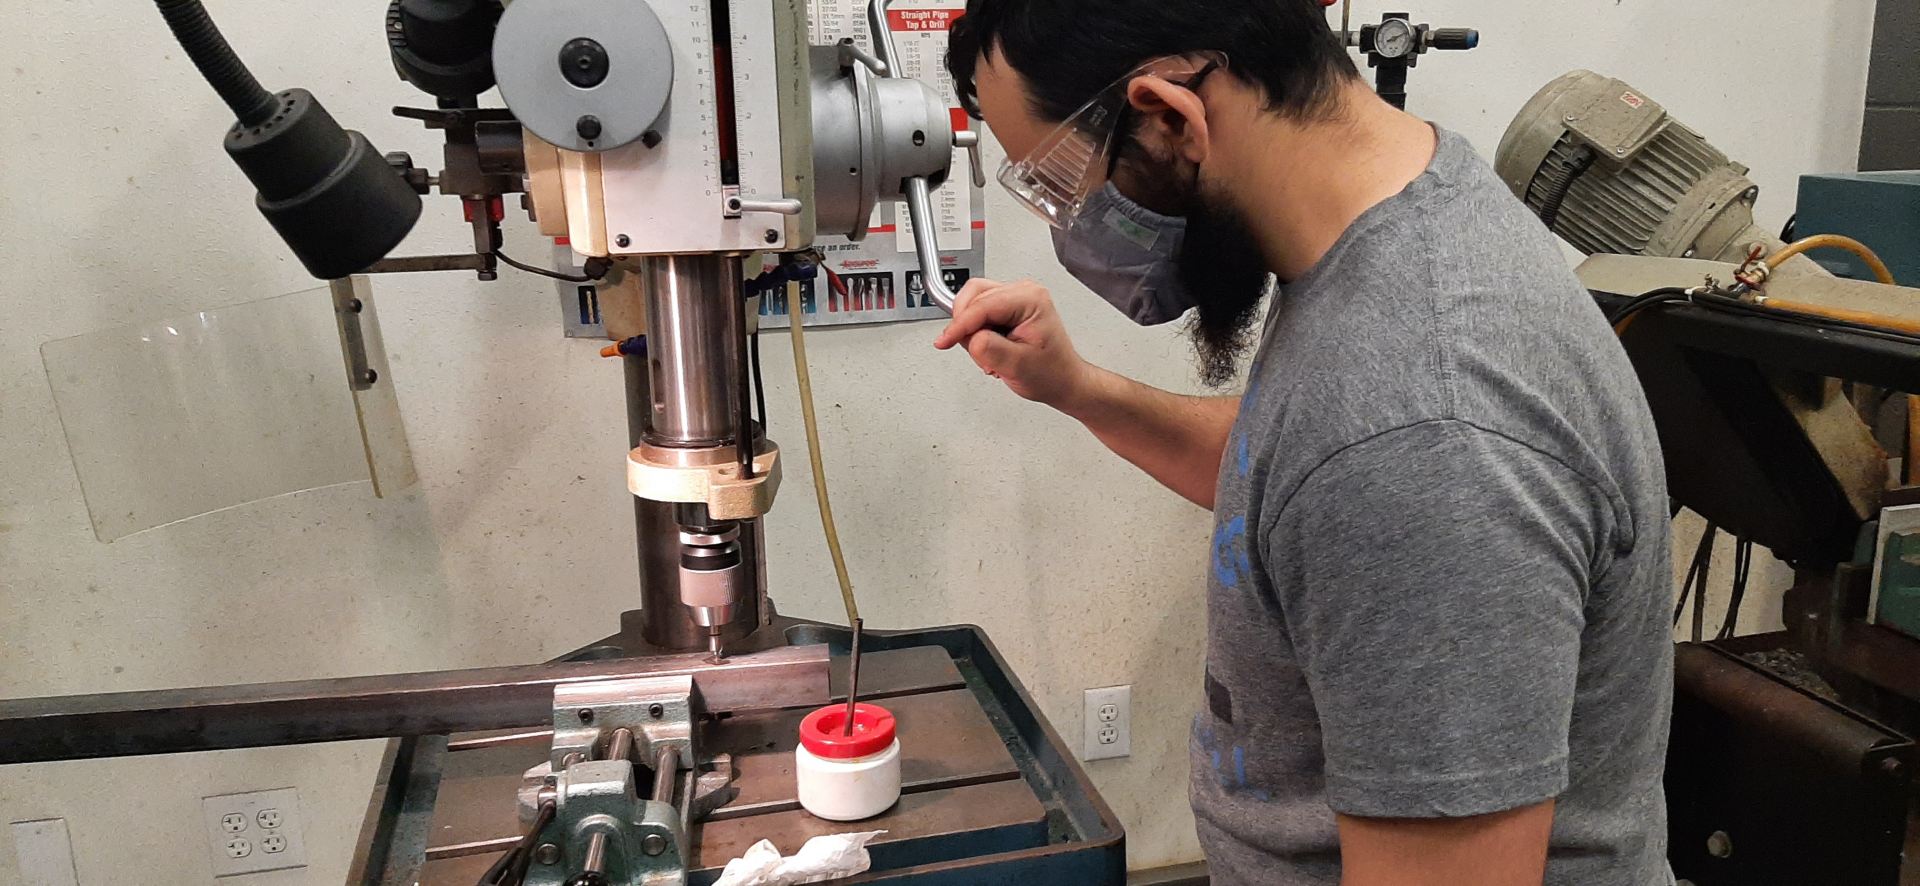
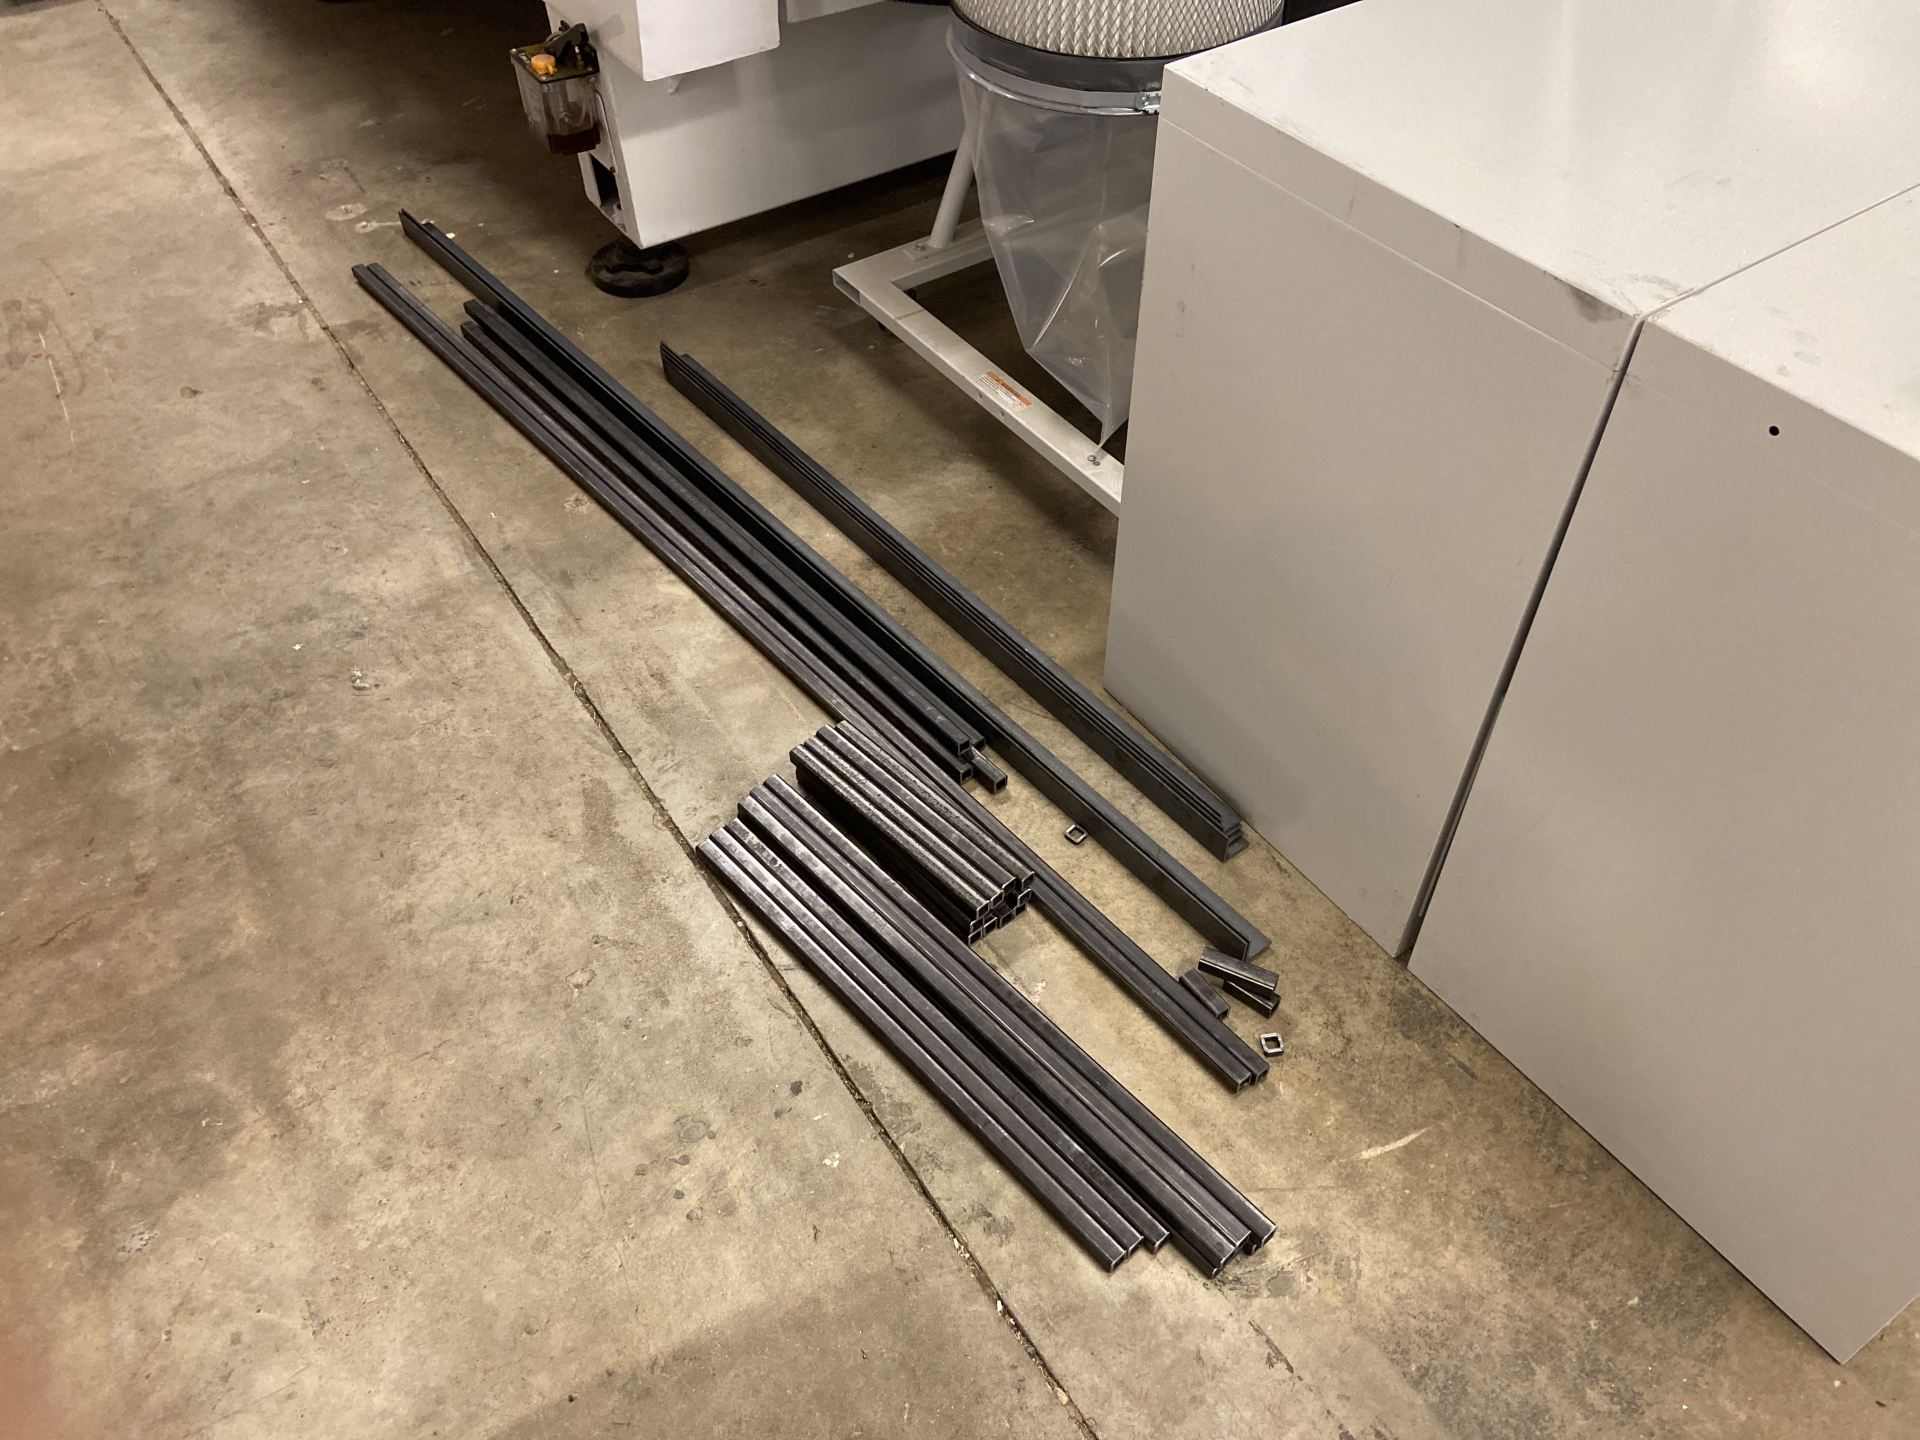
Around the second/third week of November, the materials were finally delivered to the UTD Machine shop. During our Wednesday lab time, 2 of our team members went to prep and clean the material to start cutting, while the other team member worked on the CAD drawing of the new hinges and the detachable bottom. On the last week of November, we all went as a team to the machine shop and started cutting the steel tubing.
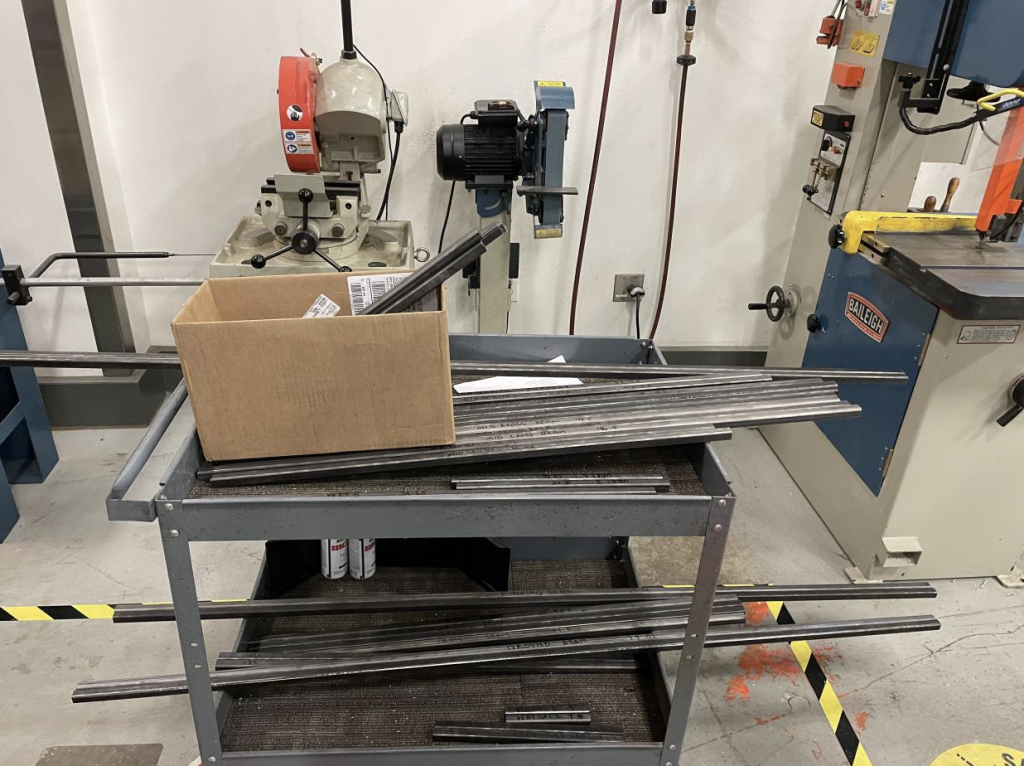
Labeled material that is cut up to the lengths needed
Plans for the End of the Semester
Finish cutting the last parts of the lower ramp
Have andrew weld everything together
Finish EPICS exhibit poster and write the final project paper for next semester
In the month of October we did the finalization of all the logistics of the project. We managed to find the most cost efficient way to order the needed materials for the trailer and started working on the assembly drawings for the manufacturing. While analyzing the previos teams design we found that having 2 big heavy steel sections of the ramp folding on to each other would be a big safety hazard when putting it away. In order to minimize this danger we decided to make the lower ramp detachable in a way that the only real change would be a mechanical joint change. This redesign will not affect our timeline nor budget making it the most efficent way of solving this problem.
Trip to Equest
On October 10 the Neigh Sayer’s visted Equest and briefed with Bobby (our sponsor) on our team’s progress. We went over to get approval of our new redesign and along with that we got some feedback from Bobby. He approved the design as long as the lower ramp section was able to store within the mid-ramp itself.
During this month we established our place as the Fall 2021 roster of the Neigh Sayers by completing our Team Charter. After that, we began to go over the materials that the previous semester team left for us. We found that the previous team left a list of parts that we needed to order and a list of things that still needed to be done with the project. In order to get more clarification on some things, we contacted Jarren Kreska (a member of last semester’s team) to come during our lab time to give us more details on the position of the project.
Later on in the month, we completed the BioRaft training in order to gain access to the UTD design studio as well as being able to start the FAB Shop Training that we needed to work on the project. After talking to Andrew Bitner we went over the CAD files and came up with a more feasible semester plan. The goal for this semester is to complete the manufacturing of the mid ramp and lower ramp while making the adjustment to the lower ramp. The adjustment that we are considering is to make the lower ramp detachable making the folding parts lighter and lowering the risk of a safety hazard.
Semester Timeline
Trailer Update
The trailer had been parked, all throughout the summer, in the back parking lot by the EPICS Studio. On September 26, the parking permit that we had expired. We had no choice but to move the trailer inside the new EPICS room. In order to make the trailer fit through the doors, we had to remove the axle with wheels before transporting it on its side on dollys. We had 3 other people help us along with this process. In the future, we plan to move the trailer to the machine shop where we can work on manufacturing the other two sections.
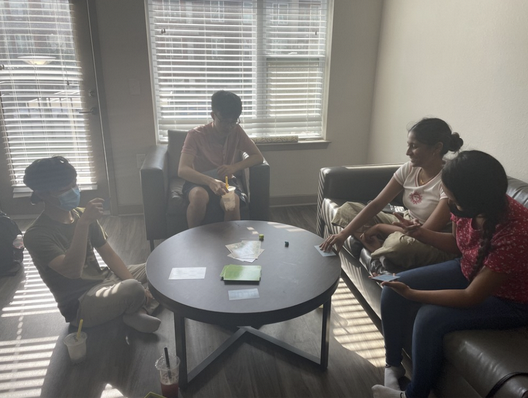
During the remainder of the time, we had this month, we introduced ourselves and became acquainted as a team. We did a team bonding activity by getting boba together and playing board games. The team learned more about each other while having fun together.
This month, we spent the rest of our time on the project getting the top platform assembled and attached to the trailer base. Aside from that, we spent some time arranging a document for the incoming team that should serve as a crash course into the assembly process and allow them to get started immediately.
Preparation
We began this month by moving the trailer base to the UTD Machine Shop from the UTDesign studio. During this process, we learned that the trailer base is much heavier than we expected – around 500 pounds – which might be an issue further along in the project.
The unfolded trailer base on the way to the UTD Machine Shop.Transporting the trailer base to the UTD Machine Shop.
Then, we finished sanding the remaining rough edges on the steel and organized/stored the pieces by length for easy access.
Sanding a rough edge off a piece of steel tubing.Making final cuts to a piece of steel tubing.
Next, we ordered the nuts, bolts, washers, and Rustoleum that were necessary to successfully complete the attachment of the top platform to the trailer base. In our design, we planned for the attachment between trailer base and top platform of ramp to be through bolting as opposed to welding due to maintenance and trailer replacement considerations. Overall, bolting makes the design much more robust and maintainable for Equest.
Procurement form for Nuts, Bolts, Washers, and Rustoleum.
Assembling the Frame
After making preparations, we assisted Andrew Bittner in the UTD Machine Shop with welding. Although we were not allowed to directly weld anything ourselves, we were able to optimize the process through live explanation and smaller tasks.
The trailer base in the UTD Machine Shop ready for assembly.Our cut steel tubing and angle iron, ready for the assembly of the frame of the Top Platform.
Our final task this semester was to apply a coat Rustoleum to the Top Platform of the ramp to both prevent rust and give it a nicer appearance. As the ramp will likely be stored outside of the machine shop this summer, this was an important step in preserving the structural integrity of the ramp.
Final Message
We spent our remaining free time arranging a document outlining the procedures we took to access the machine shop and to order our materials. Using the Parts List and the Future Procurement Summary, next semester’s team should be able to quickly update the ramp design and begin ordering core components immediately. We wish them the best of luck, and hope to see the Portable Mounting Ramp finally be completed by the end of next semester! Neigh Sayers, signing off.
April was the month we finally made substantial physical progress on the ramp, along with organizing a logistical framework for the assembly process. Most of this month was geared towards completing the top platform of the ramp, learning from the process, and outlining a framework for the rest of the ramp assembly process.
Logistics
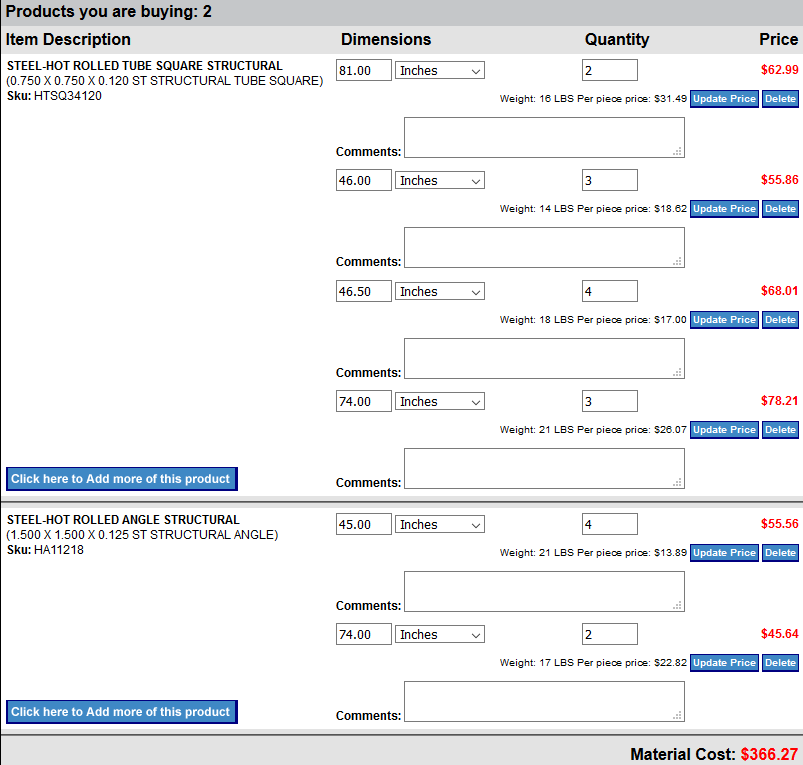
We began by contacting vendors from which to order our steel for the frame of the top platform and also contacting Andrew Bittner from the UTD Machine Shop to set up our in-person training and review our engineering drawings. We ended up choosing MetalSupermarkets as our vendor as they cut the steel to lengths we specified and delivered quickly and free of charge. We refrained from ordering the walking surface of the ramp, as our primary focus with this order was to complete the frame of the top platform and attach it to the trailer base.
Order Confirmation from MetalSupermarkets
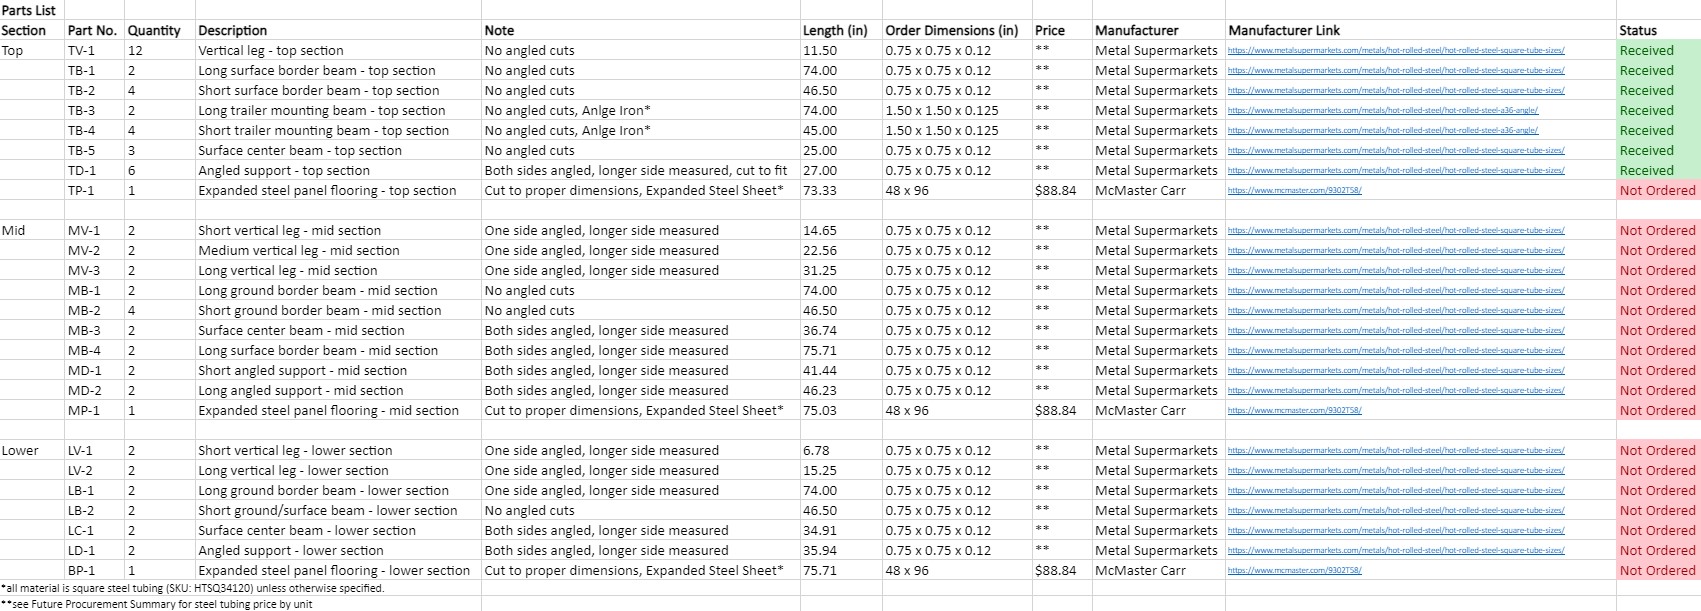
Then, we created a Parts List to document all the core ramp frame parts needed for assembly. This included parts we already had, and parts that would need to be ordered in the future. We also developed a custom part number for each part, for organizational and labelling purposes.
Parts List for core ramp components
The main reason we established the Parts List was so we could plan the future procurement of core ramp components weeks in advance and streamline the process. This will increase the time we have to work in the Machine Shop in the future assembly stages. Moreover, we also were able to obtain a rough estimate for the amount of money we would need for the rest of the core components of the ramp.
Future Procurement Summary for upcoming core ramp component purchases.
Assembly
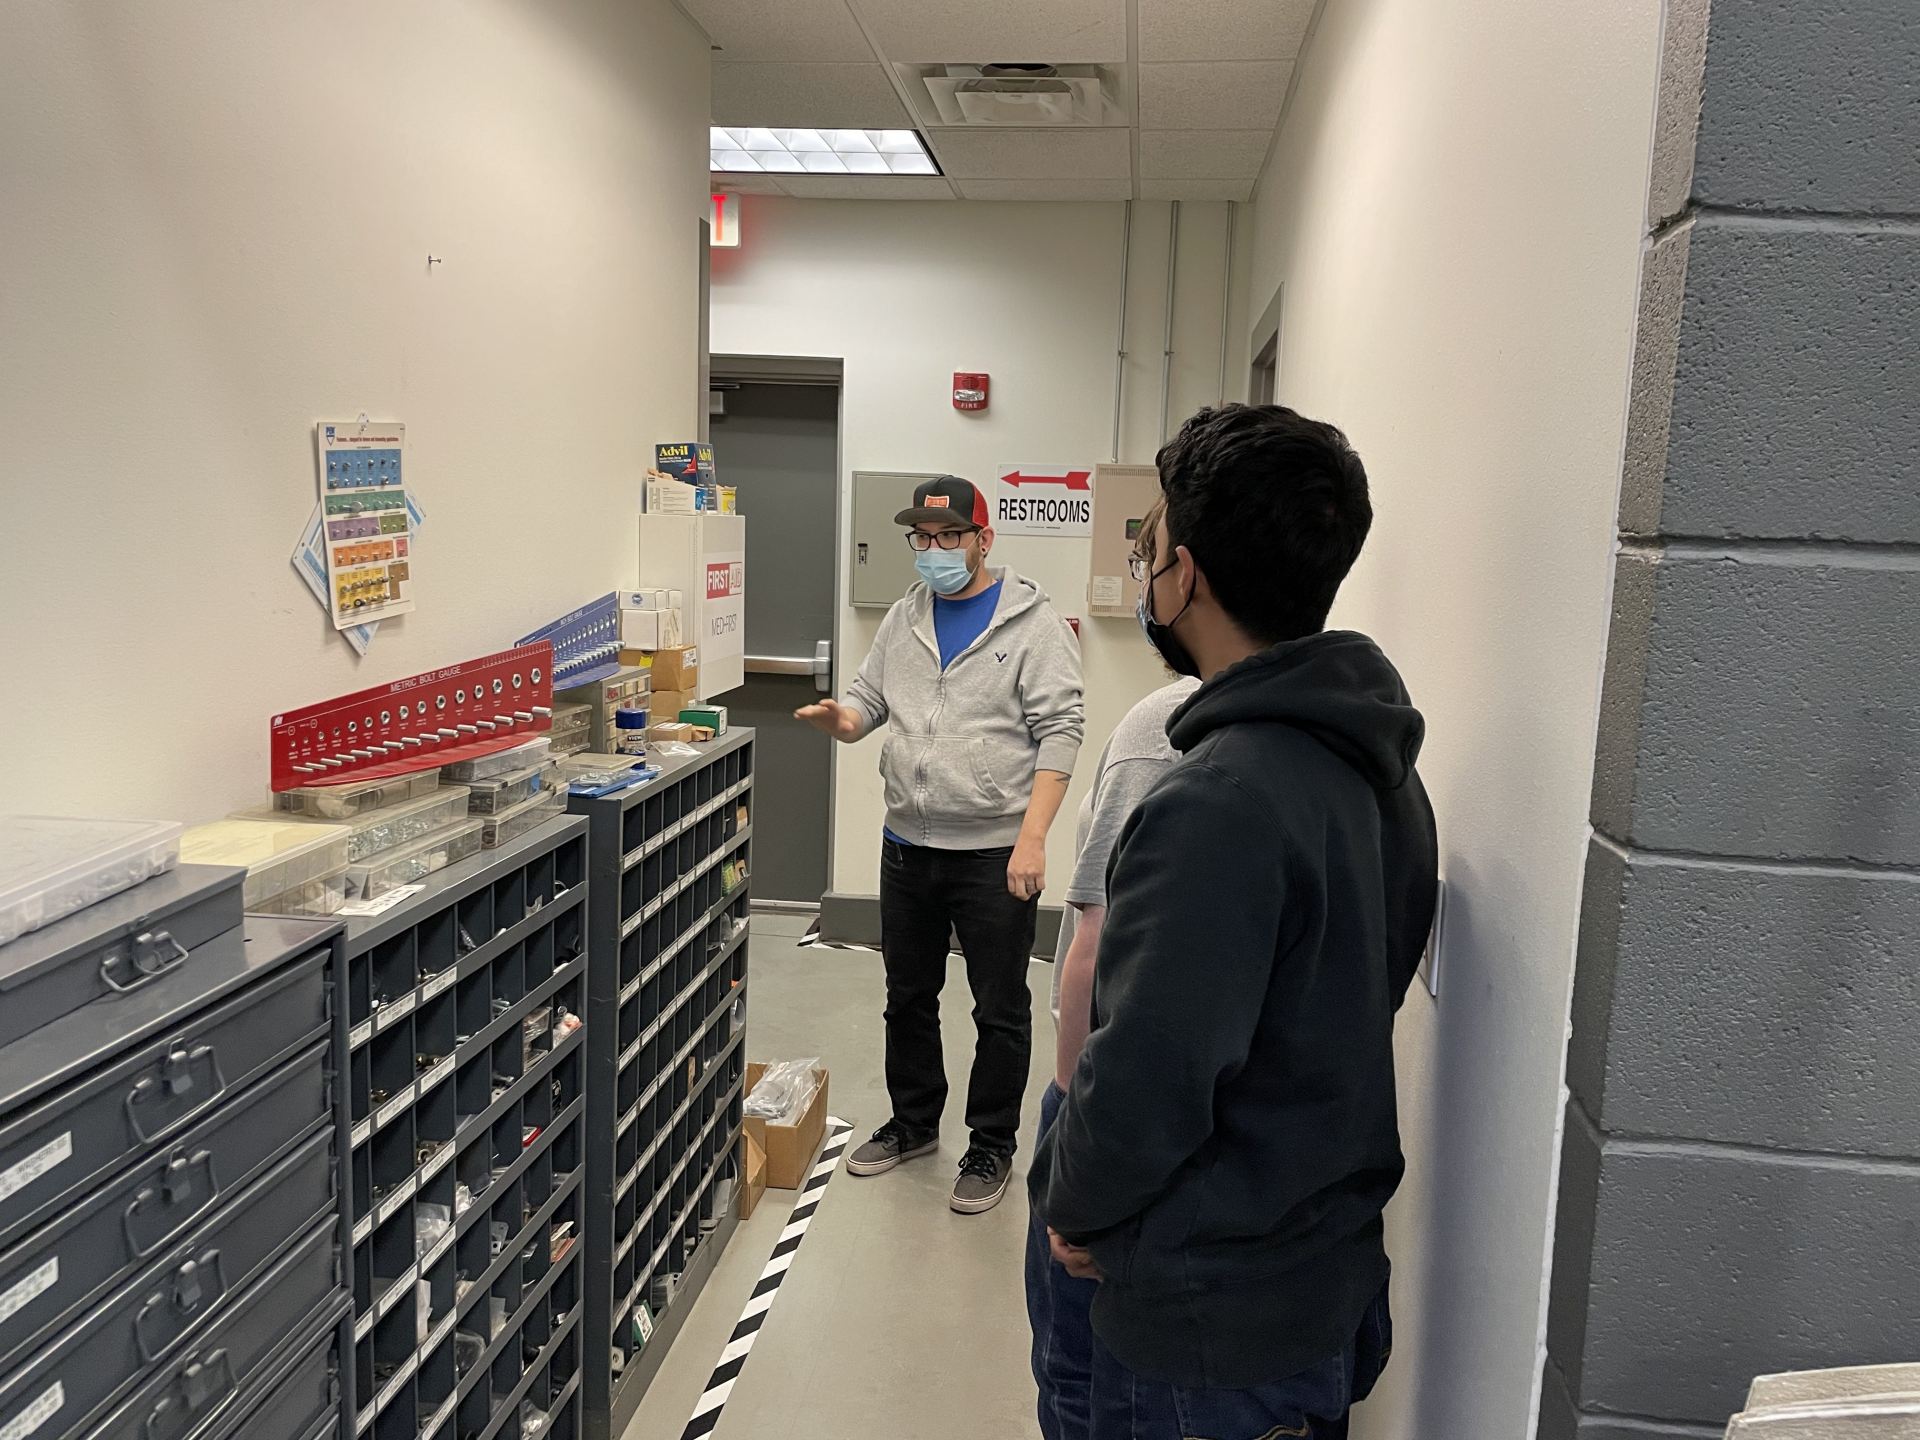
Our first experience in the UTD Machine Shop was a crash course on the machines we would be using for cutting and sanding the steel we ordered. Our main purpose in the machine shop was to prep the raw components for Andrew Bittner to weld and to provide detailed engineering drawings for him to use during assembly. But first, we needed to complete our training.
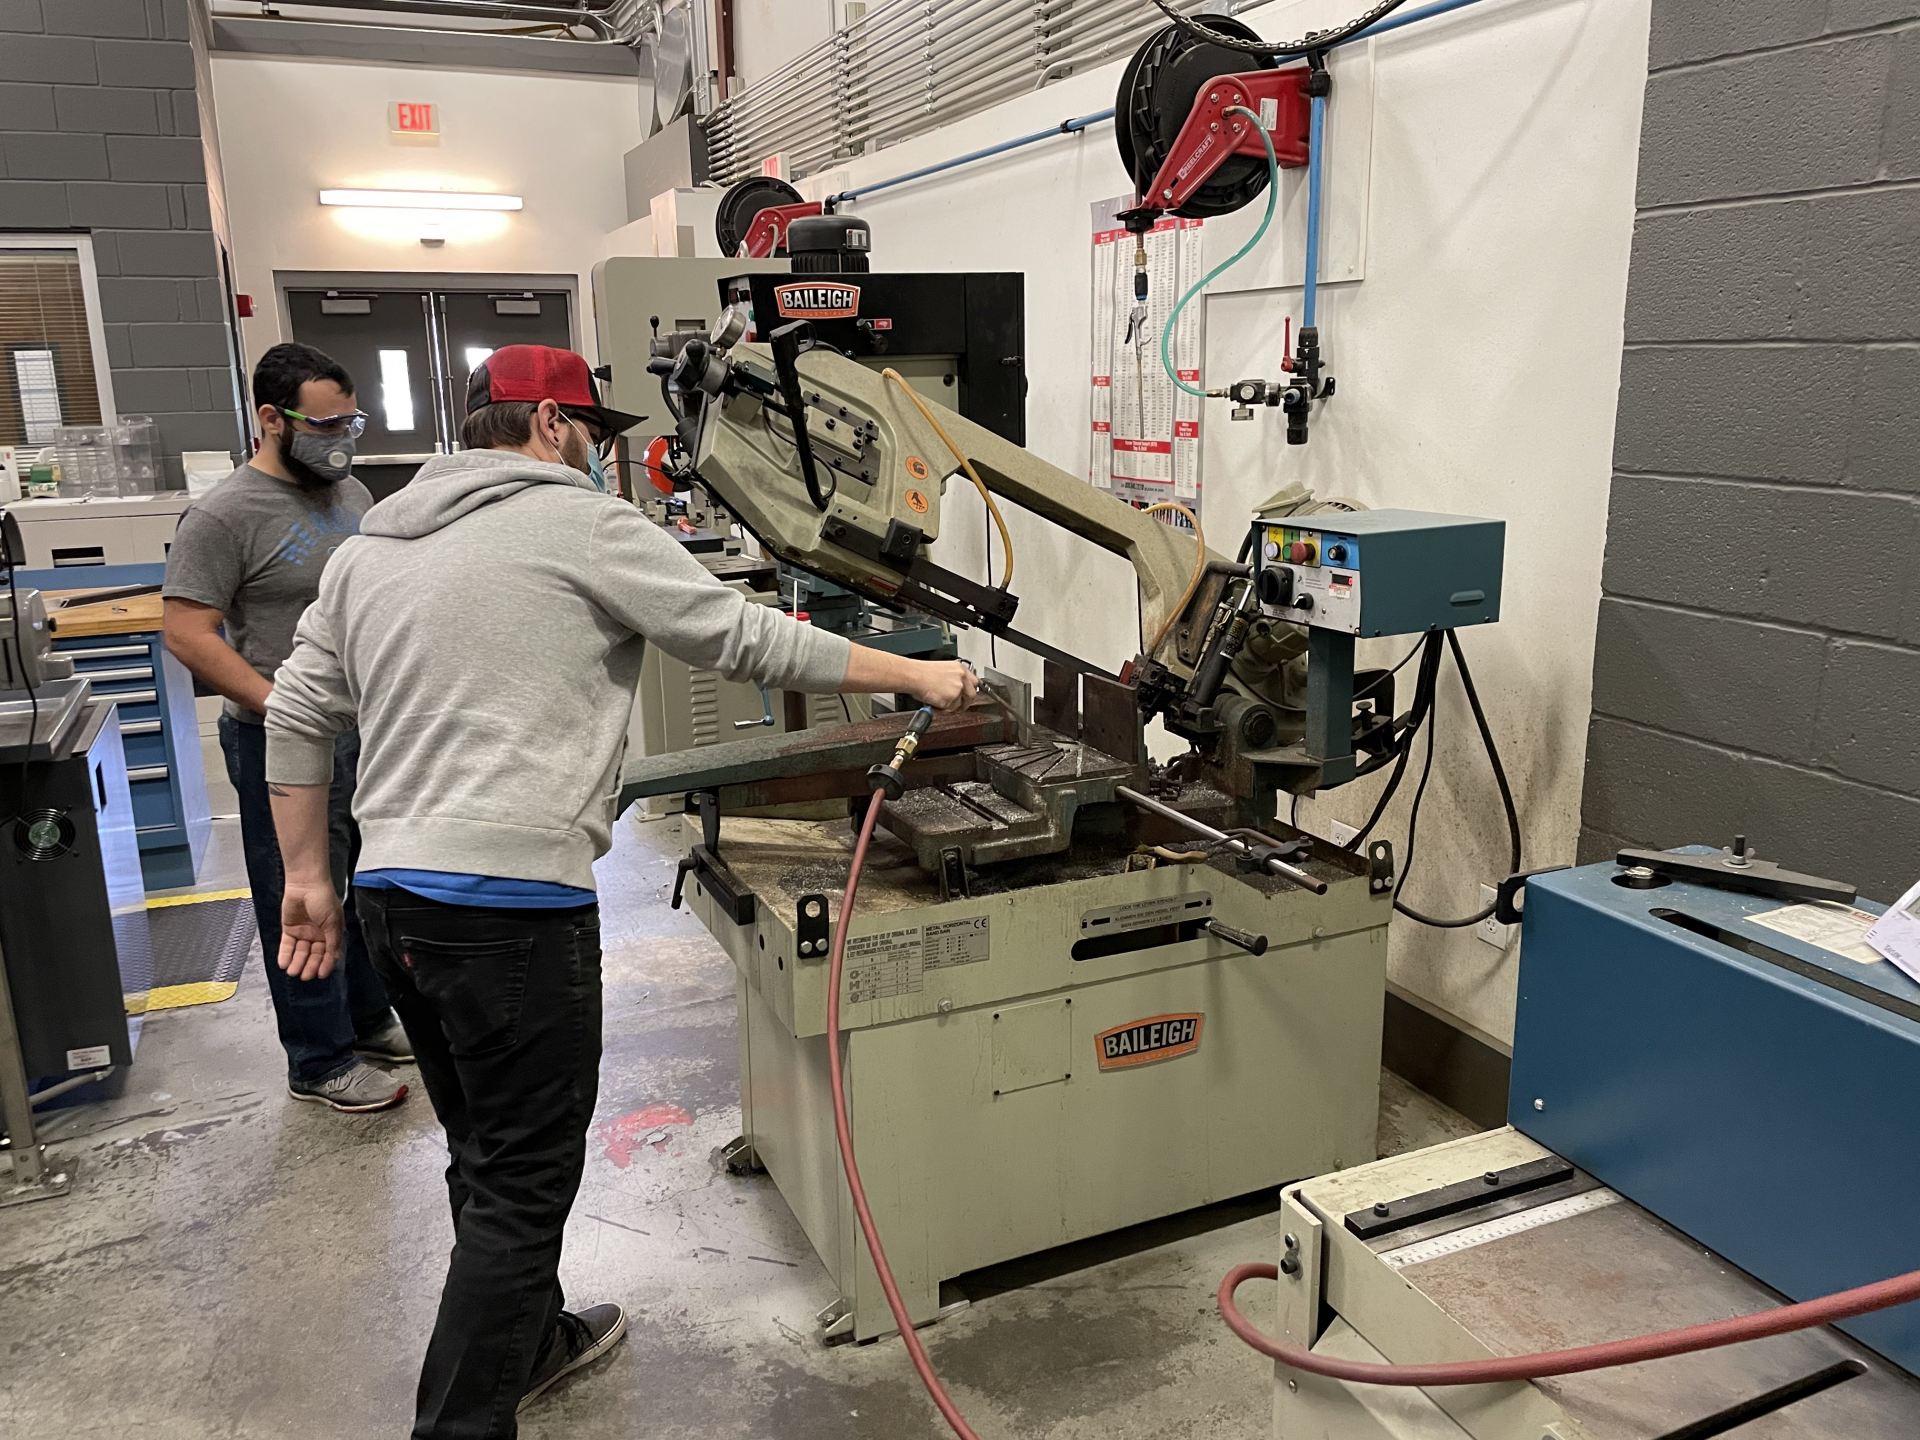
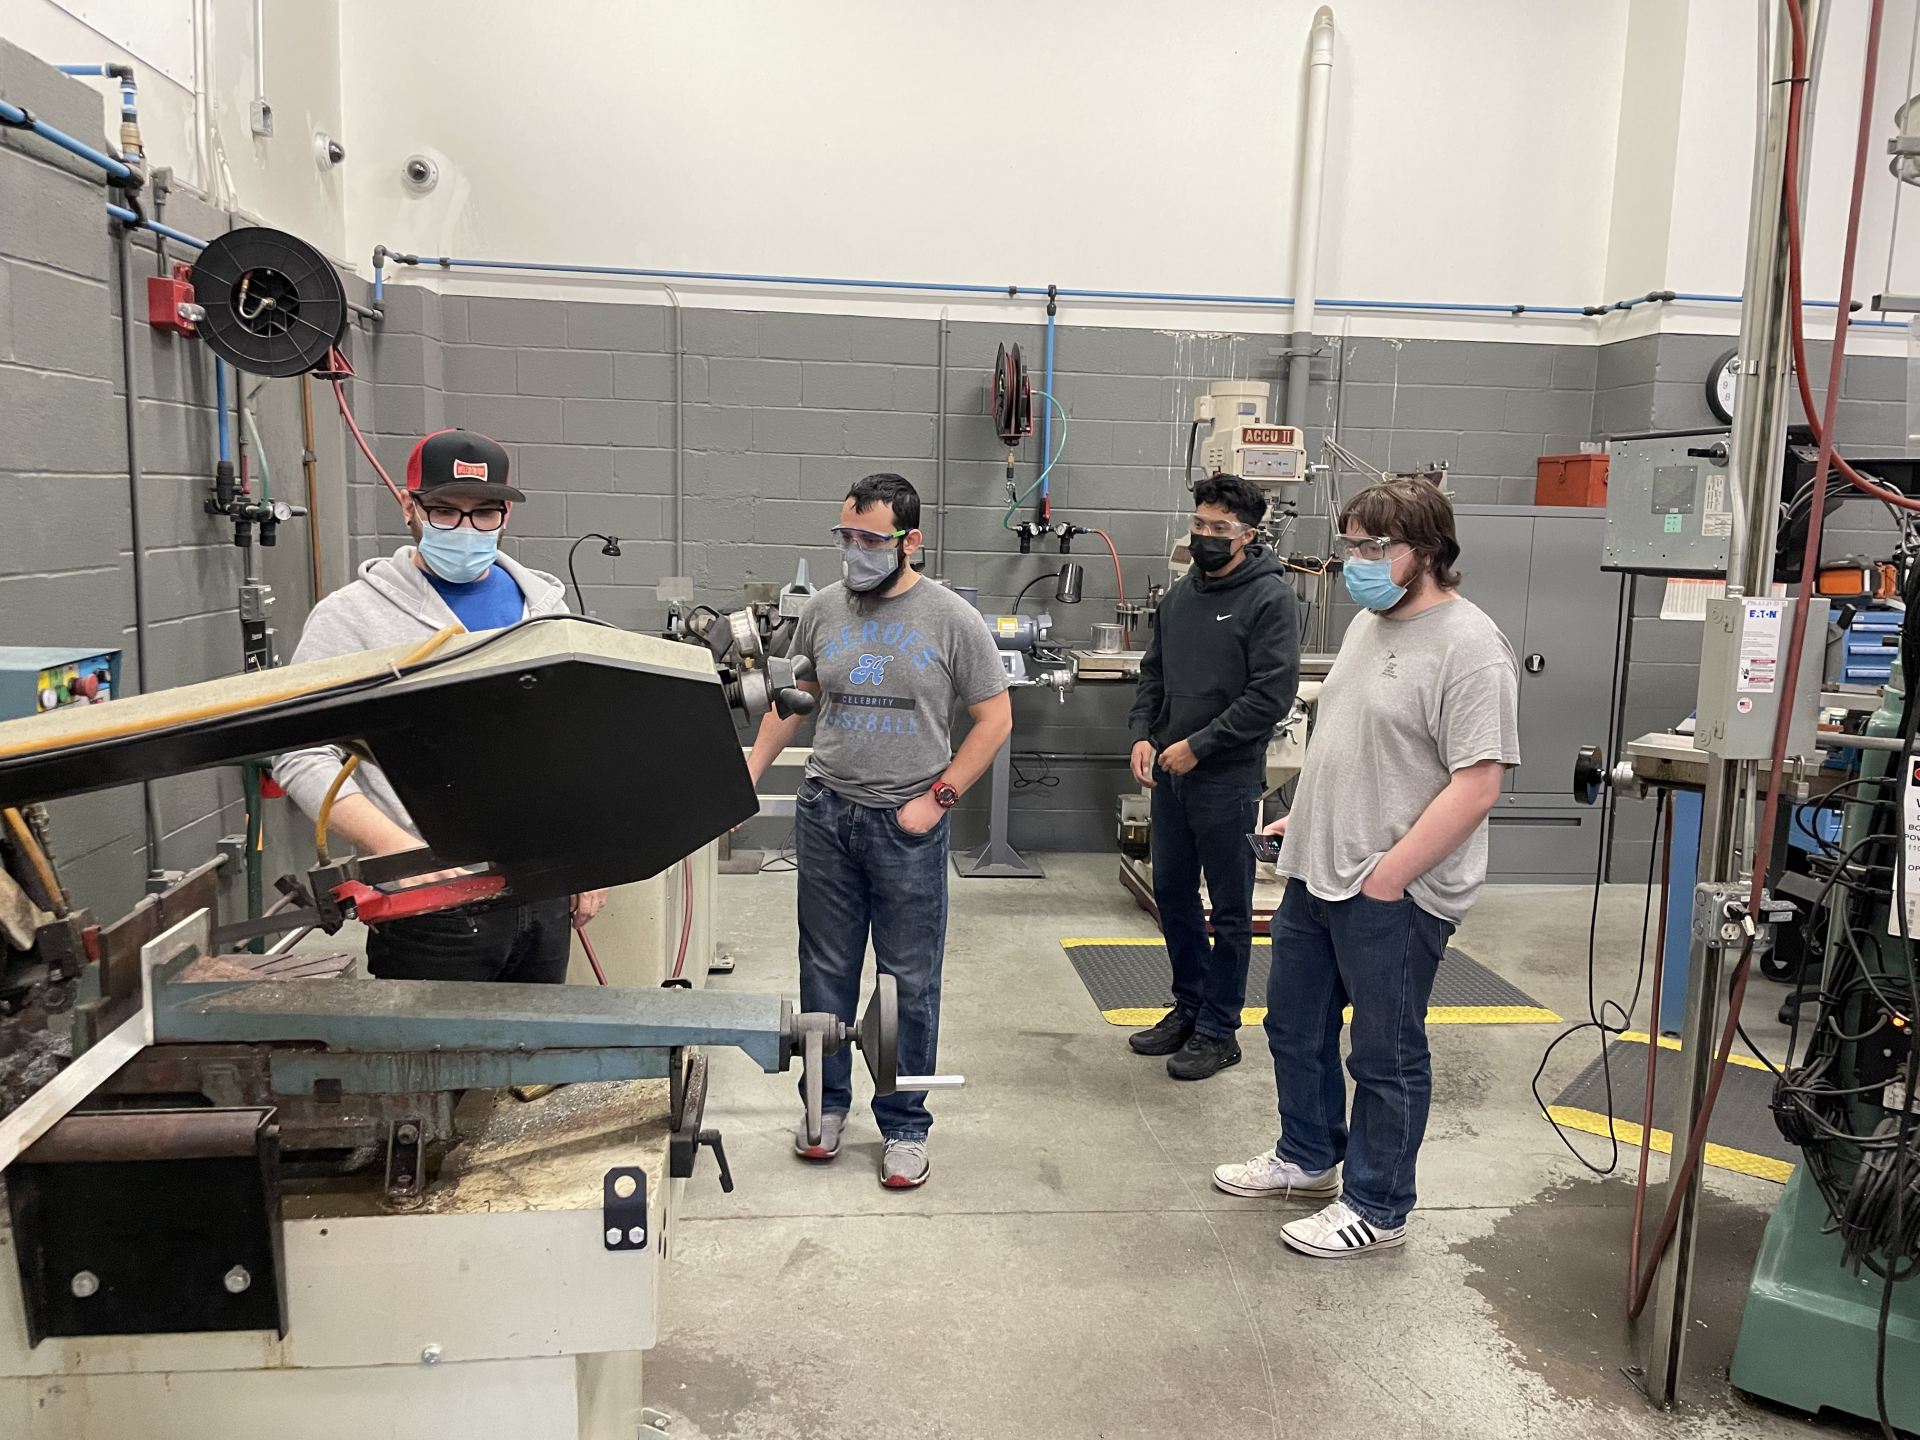
Andrew Bittner instructing the team on safety protocols in the machine shop.
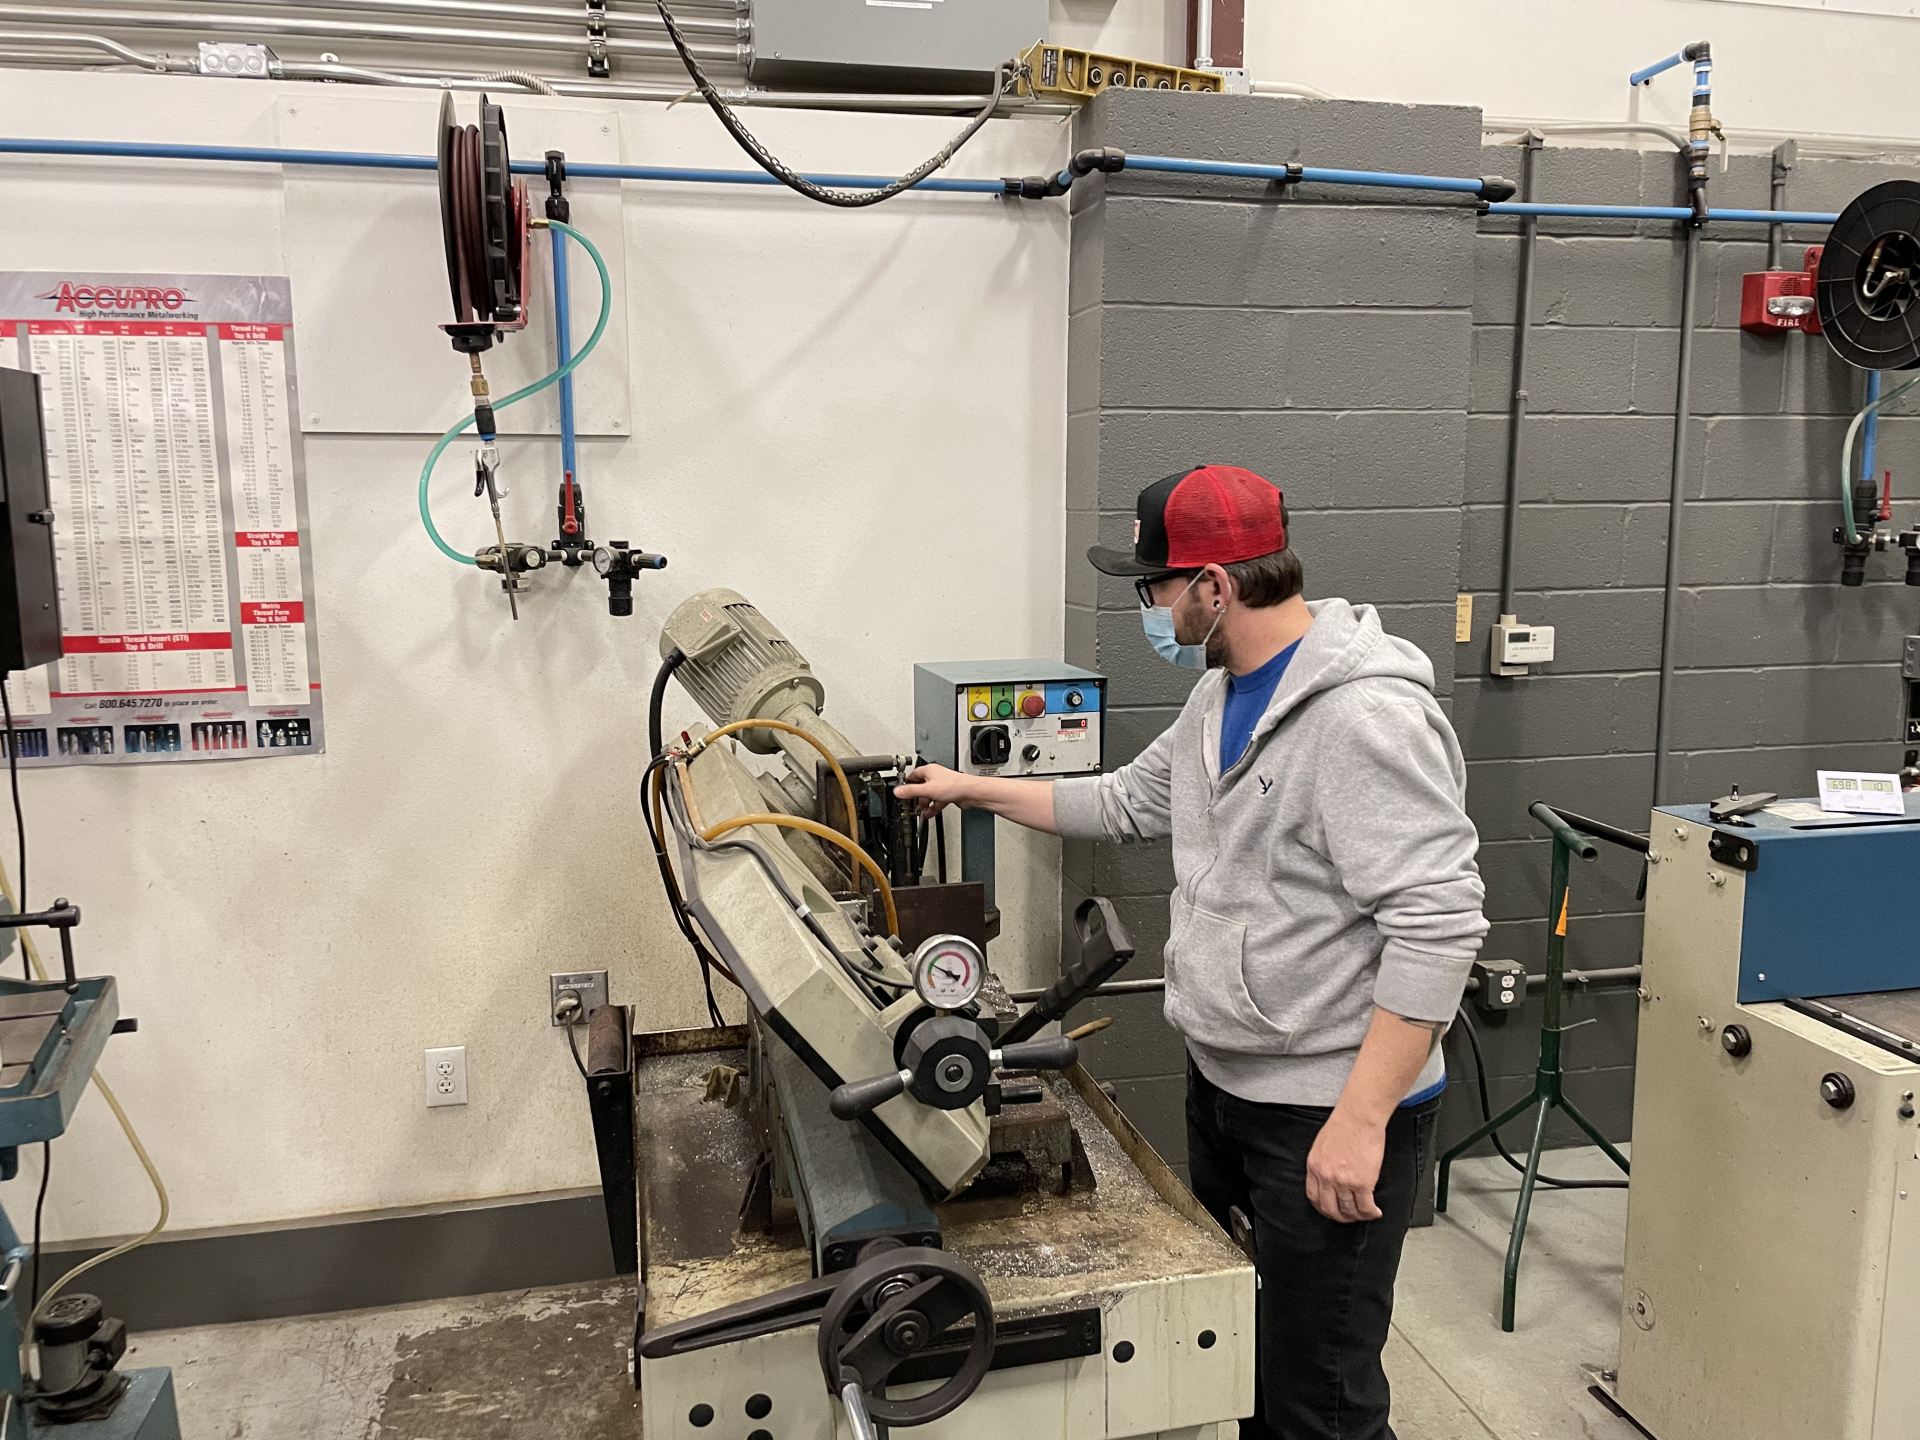
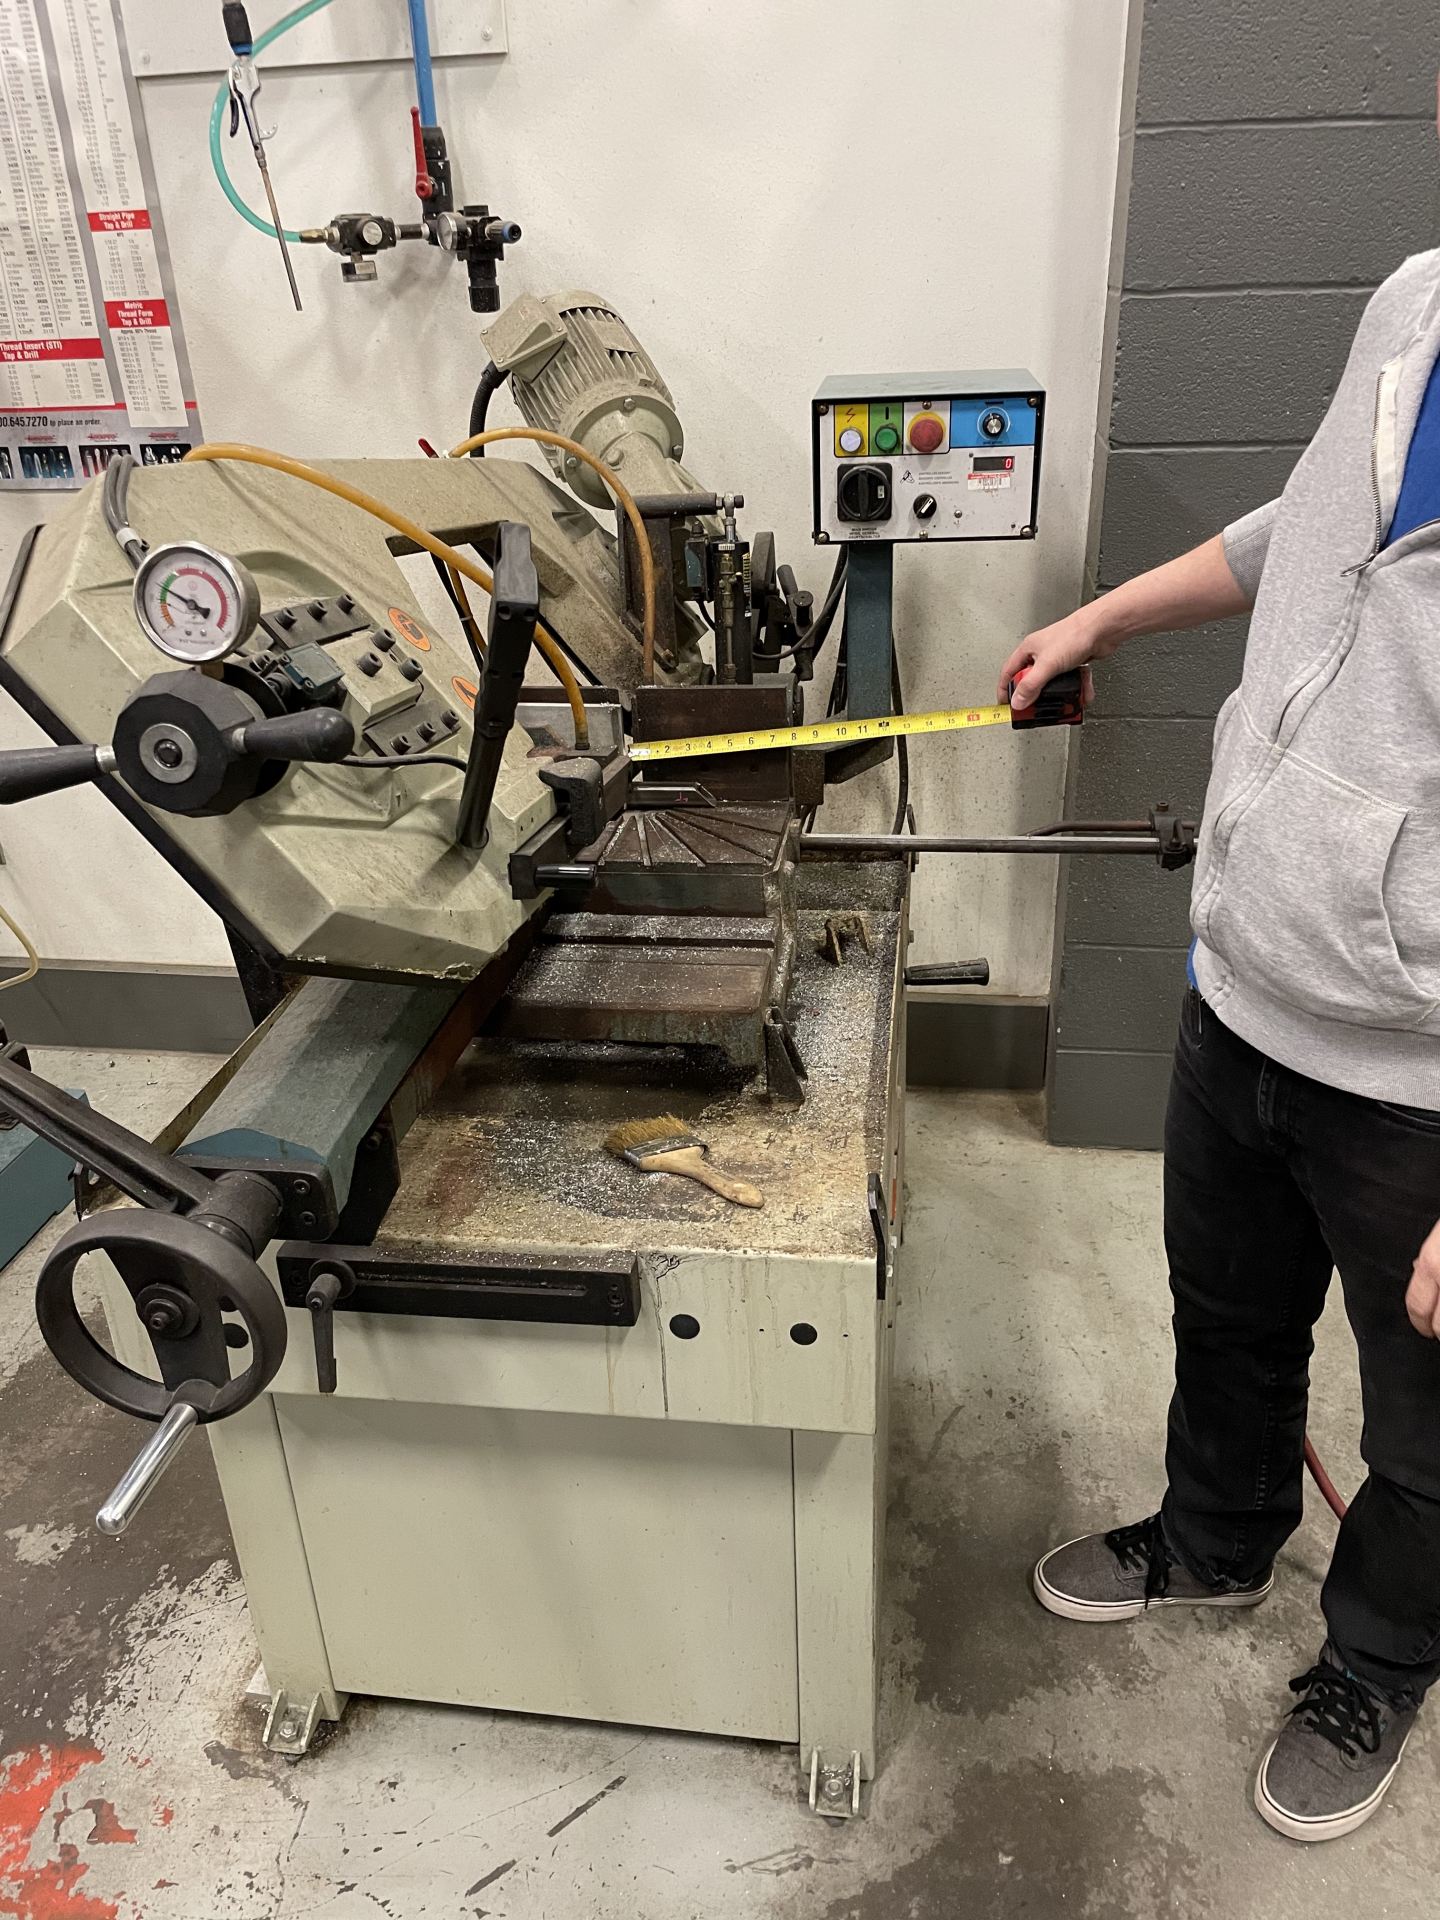
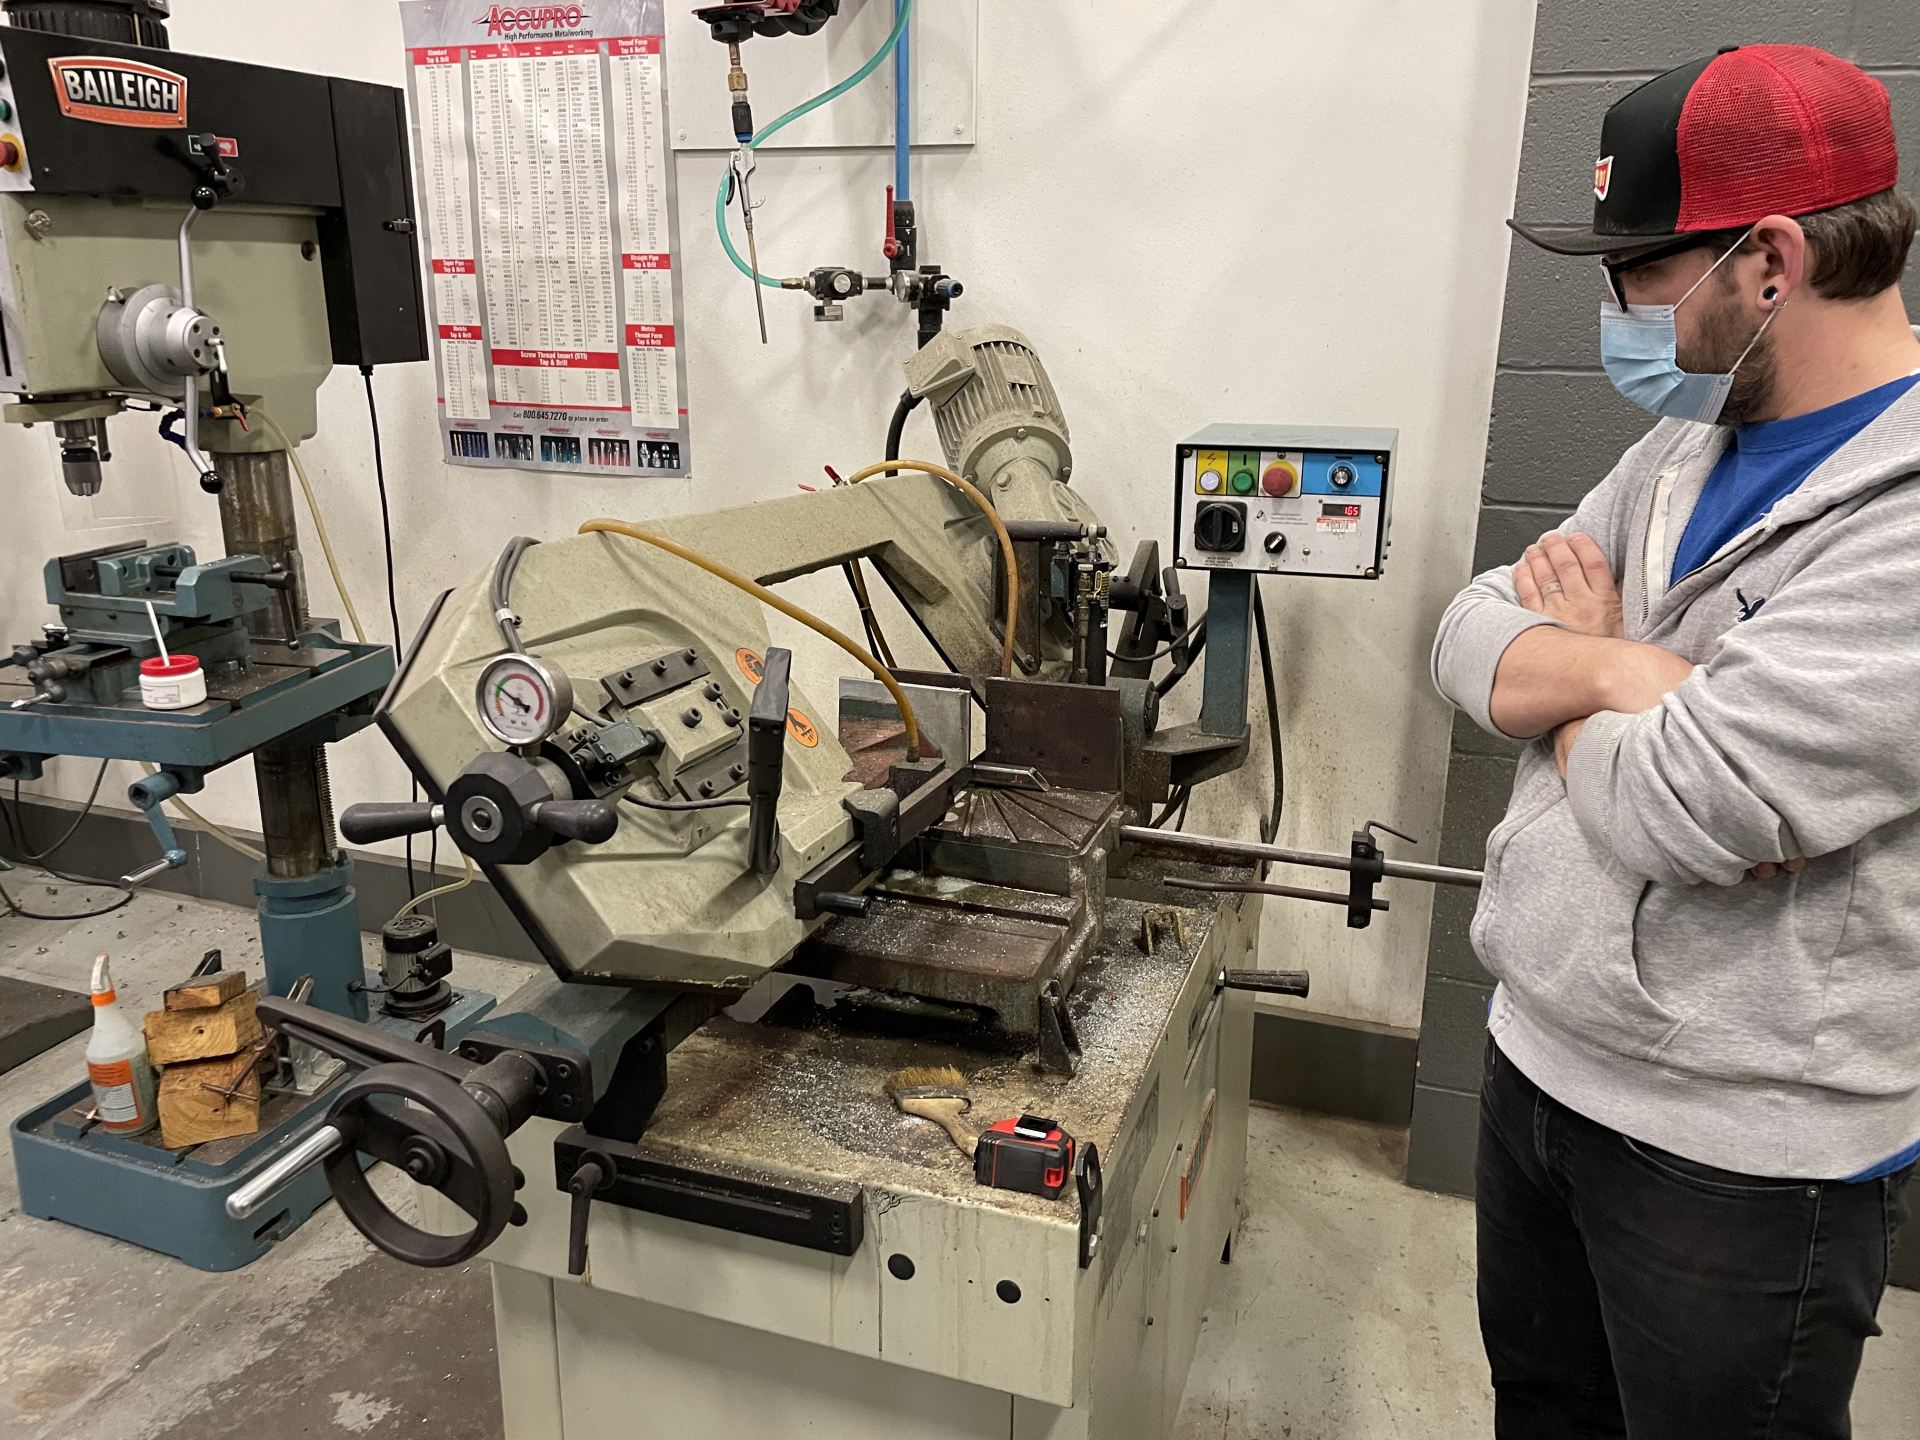
Demonstration of the horizonal band saw we would use to cut our steel.
Demonstration of the horizonal band saw we would use to cut our steel.
Demonstration of the horizonal band saw we would use to cut our steel.
Demonstration of the horizonal band saw we would use to cut our steel.
Demonstration of the horizonal band saw we would use to cut our steel.
Demonstration of sanding rough edges off a cut piece of steel tubing.
After our training, we moved the steel from the UTDesign Studio to the UTD Machine Shop and began cutting and sanding the components. After this, it was time to help Andrew Bittner weld the frame of the ramp together.
Video of us cutting some of the steel tubing with the horizontal band saw.
Future Design Considerations
While doing training in the UTD Machine Shop, we noticed another trailer from a senior design team parked in the machine shop. We also observed that the senior design trailer had a stabilization mechanism in place to hold the trailer steady while it was being loaded. We realized that our portable mounting ramp, being mounted on a trailer base with wheels, would also experience similar stability issues as that of the senior design trailer.
Senior design trailer with wheel stabilizing mechanism to prevent trailer movement during use.
Our other upcoming design consideration is the railing solution. Although we created a price quote for the future core ramp components, we also made plans to add a permanent railing holder affixed to the ramp, meaning we would need to order more steel.
Upcoming Plans
For May, we will focus all of our efforts on preparing the raw materials for their final assembly during this semester. We will need to move the trailer base from the UTDesign Studio to the UTD Machine Shop, and we will need to order nuts, bolts, washers, and Rustoleum for the top ramp platform. Given the business and short length of our time on this project in May, it’s sure to be an exciting month.