Updates


Electronics


Update:
We were able to get a hold of the Arduino Nano and get it functioning. We are in the process of ordering a 4×4 breadboard to also try to fit it inside the 3D model.
Prototype Update:


We are able to get our prototype onto our guitar and our project sponsor approved this idea. Of course, this prototype is not perfected, but we did end up getting a function prototype as well are working electronics.
Initial Prototype


Prototype Updates:

We were able to 3D print different versions of CADs to test and modify them. We adjusted quickly and began designing new designs. Our partner project gave us feedback and we adjusted as needed.


Electronic Updates:
We were able to get our code running, as well as our electronics working as we prepared for our mid-term presentation. We have running code that we have adjusted and calculated angels for. The reason why we have angles is to help figure out how much torque is needed to press down on the strings. We are wanting to buy an Arduino Nano since we decided that the Arduino Uno was going to be too big for the 3D prototype. We are also wanting to buy bigger buttons for the HIPsters so they have less pressure and are easier to access.


Initial 3D Model Designs

First CAD

Second CAD
We were able to make two 3D designs in the month of February. The second design offered more space for the servo to fit in. For electronics, we were using an Arduino Uno. We had to think about how and where were we going to fit it inside the 3D model. We were also starting to prep for our mid-term project presentation.

Meeting With Our Sponsor
We met up with our project partner Dalton Tate for the first time in person and discussed last semester’s prototype and what all they have accomplished. We discussed designs and any modifications that were needed. Ultimately, we chose to start the project from scratch. After discussing with Dalton, we were able to start our initial sketches.

Initial Sketch
We were able to agree on an initial sketch and went for an electronic and mechanical approach. Some of the requirements for the guitar adapter were that it needed to:
-Strum the fifth and seventh chords on the fret
-Needs to adjust according to the guitar’s neck size
-Buttons that easily push down
-Needs to be strong enough to push down on the chords.

February Goals:
-Finish CAD
-Work on our first prototype
-Start on code
-Get partner’s feedback
We finished our goals! April has been a big month for development.
We decided to switch from joystick control to IR remote controller. This is much easier to use and more convenient for My Possibilities students.

We connected our remote to the Arduino Mega circuit via an IR receiver. The receiver has good range and we have not encountered any substantial problems.
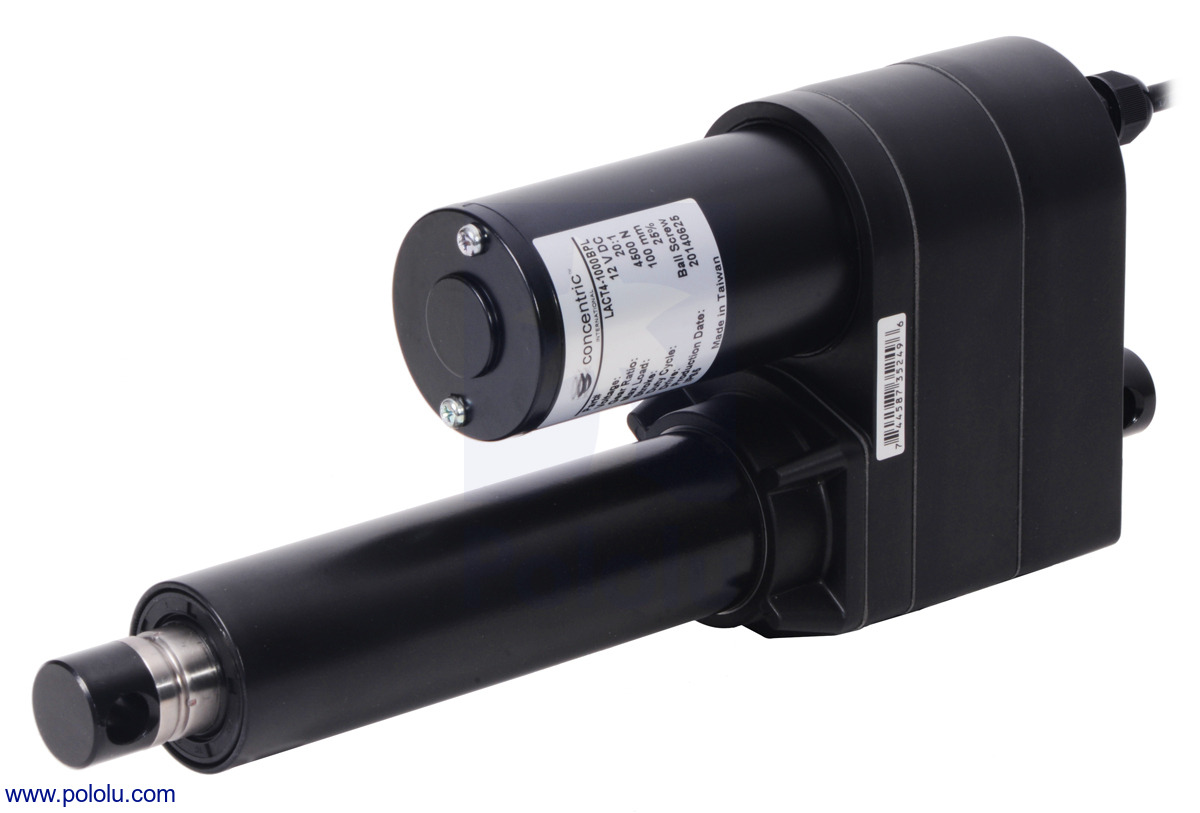
We also connected both the linear actuator and stepper motor to our circuit. We can move the table up/down and rotate it as needed.

The tabletop has also been attached to the frame.
What’s Next
- We’ve noticed that the 3D-printed pieces we are using are not consistent or durable. They will have to be replaced.
- The electrical subsystem will have to be moved inside an electrical box and then attached to the table frame.
This month has involved a lot of planning.
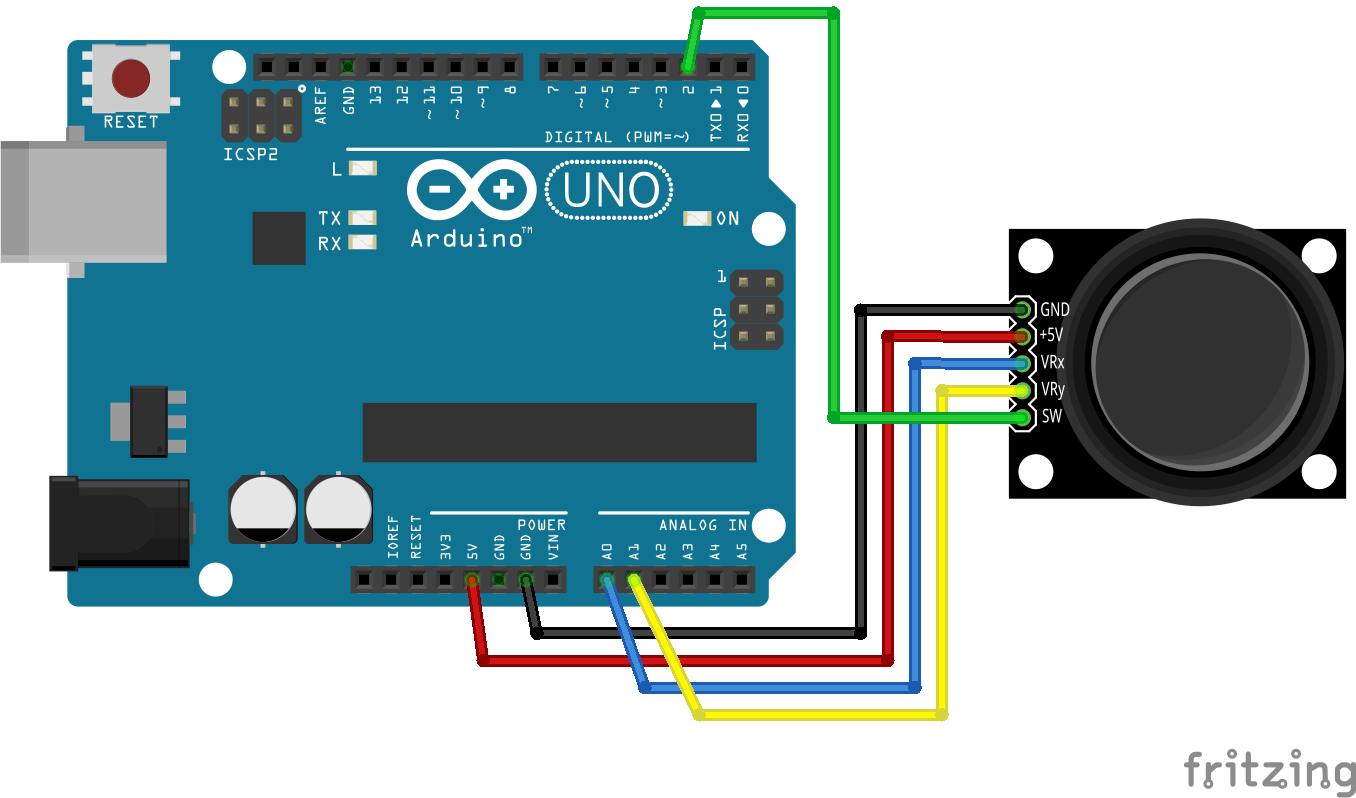
We experimented around with controlling one of our motors with a joystick. We managed to get our actuator to lift up and down based on joystick movement.
We also finished our project brief and met with our partner again to solidify project requirements. While we expect March to be a part of the “figuring things out” phase, we know that a lot of our development will happen in April.
This month has been very productive for our planning.
We successfully ordered and received our new circuit-board, the Arduino Mega 2560 Rev3, seen below:

The board is necessary as the previous board we had, the TI Launchpad, was unable to support our linear actuator (voltage-pin issues). Alongside this, there is much more support available online and a better IDE for Arduino. This will make code development and testing a lot easier.
We also got in touch with our partner to set up a communications channel and verify our milestones for this semester. They agreed with our project plan and what modifications we are planning on making.
For the tabletop, we finished a rudimentary list of specific things we need to accomplish to mark it off as completed. This includes:
1. Smoothing the tabletop edges.
2. Attaching LEDs to the table surface.
3. Attaching the pencil-box to the appropriate location.
4. Adding some form of counterweight to balance the motor on the other side of the tabletop.
On the software side, we determined that the existing code would require quite a few changes to work properly. For testing, we are using a nunchuk to control our motors. We decided to use an existing nunchuck Arduino library to simplify development.
For electronics, we have had issues getting everything connected (actuator, rotational motors) but we are actively working to get everything attached as soon as possible.
Our team used this month to plan out our schedule for this semester. We plan on ordering/gathering remaining parts, contacting former team members for project information, and setting goals/expectations for this semester.
Our goals are:
- Finish circuit to connect all electronic components together.
- Finish tabletop design and additions (pencil-holder and LEDs).
- Attach everything together.
Goal 1 has been determined to be feasible within 5-6 weeks, and Goal 2 has been determined to be feasible within 1-2 weeks (and both can be worked on concurrently).
Goal 3 is a reach goal as setbacks may prevent us from completing the table in its entirety. However, our other two goals will make sure that Danyal (who has already agreed to work on the project over summer) can easily put everything together.
This month we had to readjust our overall semester plan to accommodate for the notable changes in our Team structure.
Initial Semester Plan

Current Semester Plan
We eliminated the 3rd Stage of our plan to accommodate our smaller number. This allows us to be more efficient in finalizing and preparing the intricacies of the final proposed prototype for future semesters.

Component Updates
We ordered and received the component parts that inspired and are a part of our proposed design. These parts allow us to retrace and mentally put together our physical idea. A key design query was how the different sizes of the varied pieces of the device would compliment each other. Overall, we do not want our final prototype to appear bulky. Upon receiving these pieces, we were pleasantly surprised.


TinkerCad Circuit Simulation
We were able to finalize the components that would require an Arduino input to run exceptionally. These components were specifically picked out to accommodate our needs in relation to size and function. The components included the motor, potentiometer, button, and Arduino board.
Furthermore, we proceeded to code and simulate our proposed circuit as it included the needed components, and how they would run smoothly with our base code.

Final CAD Prototype


